Blog

Details

  • Exterior Colour Trends for 2026: Nature-Inspired Neutrals Shape the Year Ahead

    by Tahmid Tahmid Jalal | Jul 07, 2026

    Exterior colour palettes for 2026 continue to move toward timeless, versatile finishes that complement today's mix of architectural styles and natural building materials. Rather than dramatic shifts, this year's trends build on colours with lasting appeal, giving homeowners confidence that their exterior will remain relevant for years to come.

    One of the most consistent directions is the continued popularity of soft, warm neutrals. Off-whites remain a preferred choice for siding, offering a clean, understated look without the starkness of a bright white. EX169 Brie is a strong example of this trend, delivering subtle warmth that pairs effortlessly with today's darker fascia, soffits and window sashes. The contrast between light body colours and darker architectural details continues to define both contemporary and traditional homes.

    EX169 Brie

    EX169 Brie colour swatch

    At the same time, earthy greens are becoming increasingly prominent as homeowners look for colours that create a stronger connection to the surrounding landscape. Muted sage greens are proving especially versatile, offering a fresh alternative to greys while maintaining a natural, understated appearance. EX031 Ground Sage reflects this movement, pairing beautifully with stone, wood accents and black window frames.

    EX031 Ground Sage

    EX031 Ground Sage colour swatch

    For projects looking to make a slightly bolder statement, deeper botanical greens are also gaining momentum. Colours such as EX192 Tree of Heaven bring richness and depth without feeling overpowering, making them well suited to modern architecture as well as homes in wooded or rural settings. These darker greens continue the industry's move toward palettes inspired by nature rather than high-contrast colour.

    EX192 Tree of Heaven

    EX192 Tree of Heaven colour swatch

    Another trend re-emerging for 2026 is the return of warm taupes. After several years of cooler grey exteriors, homeowners are once again embracing neutrals with gentle brown undertones that create a welcoming, established appearance. EX070 Burlywood exemplifies this shift, complementing natural stone, timber features and warm brick while providing an adaptable foundation for a wide range of exterior finishes.

    EX070 Burlywood

    EX070 Burlywood colour swatch

    Together, these trends point toward exteriors that prioritize longevity over novelty. Soft off-whites, grounded greens and warm taupes all offer flexibility across a variety of home styles, allowing builders, designers and homeowners to create finished projects that feel current today while remaining timeless well into the future.

  • The Right Paint for the Right Room: How to Start Any Painting Project with Confidence

    by Jerwin Bautista | Jun 26, 2026

    Knowing where to begin is half the battle. Here's how to match the right product to the right space before you pick up a single brush.

    You've decided to paint. Maybe it's one room, maybe it's the whole exterior. Either way, there's a moment most people hit pretty quickly: standing in front of a wall (or a fence, or a deck), and realizing they have no idea where to actually start.

    That moment is normal. And the answer isn't a 30-step checklist.

    It's a simpler question than most people think: What are you painting, and what does that space need from a paint?

    Every surface, every room, and every outdoor space has its own set of demands. A living room wall needs something very different from a bathroom, and a deck needs something completely different from siding. Get this right at the start, and the rest of the project falls into place.

    Here's how to think through it, space by space.


    What Kind of Surface Are You Dealing With?

    Before you think about colour, sheen, or product, take a minute to look at what you're actually painting. Is it drywall? Wood trim? Stucco siding? A weathered deck?

    The material matters because every surface absorbs and holds paint differently. Some need more prep. Some need a specific formula to bond properly. Some will eat through your first coat fast if you skip a step.

    The good news: once you know your surface, the right product and approach become pretty clear.


    interior living room prep


    Interior Rooms: Living Areas, Bedrooms, and Home Offices

    These are the most forgiving interior spaces to paint, but that doesn't mean any paint will do.

    The main thing to think about here is washability and air quality. Walls get touched, bumped, and occasionally scuffed. You want a paint that holds up to occasional cleaning without losing its finish. And since you'll be breathing in that space for years, low odour and low VOC (volatile organic compounds, the chemicals paint releases as it dries) matter more than most people realize.

    Ecologic is Cloverdale's premium interior all-rounder for exactly these spaces. It's a 100% acrylic latex finish with ultra-low VOC, which means it dries with minimal smell and is a safer choice for living spaces. It's also formulated with ceramic microsphere technology, which gives the dried film extra durability and a surface you can wipe down without wearing through the finish. For bedrooms, home offices, living rooms, and dining areas, Ecologic in an eggshell or satin sheen (a light, gentle glow that's easy to clean) is a reliable starting point.

    For new or freshly patched drywall, you'll want to apply a primer first before putting down Ecologic or any finish coat. Primer is a base coat that seals the surface and prevents your paint from soaking in unevenly. Ecologic is self-priming on most previously painted surfaces, so if you're just refreshing an existing wall in good condition, you may be able to skip the primer step. When in doubt, ask.


    Kitchens, Bathrooms, and Laundry Rooms

    Moisture changes everything. Kitchens steam up when you cook. Bathrooms trap humidity after every shower. Laundry rooms collect damp air on the regular.

    Standard wall paint in these spaces will hold up for a while, but over time, moisture causes it to soften, and that soft film becomes a breeding ground for mildew. The fix isn't more scrubbing. It's starting with the right product.


    green gloss bathroom


    Cloverdale's Kitchen & Bath formula is built specifically for these conditions. It's a 100% acrylic latex finish formulated for maximum durability in moisture-prone spaces, with superior stain resistance, washability, and adhesion that holds even when walls are exposed to regular humidity. It's available in pearl (a soft sheen that reads slightly warmer) and semi-gloss (a more noticeable shine that makes cleaning even easier).

    One quick tip for bathrooms: run your exhaust fan during painting and keep it running for a few hours after. Good ventilation helps the paint dry properly and keeps moisture from interfering with the curing process.


    Hallways, Entryways, and High-Traffic Corridors

    These spaces take a beating. Hands brush the walls constantly. Bags, strollers, and furniture leave marks. If you paint a hallway the same way you'd paint a bedroom, you'll be repainting it within a couple of years.

    The key here is choosing a higher sheen. Sheen refers to how much light a dried paint surface reflects. Flatter finishes look beautiful but are harder to clean without scuffing the film. A satin or semi-gloss finish in a high-traffic area gives you a more durable surface that's easy to wipe down.

    Ecologic in a semi-gloss finish works well in hallways and entryways for the same reasons it works in living areas: durable, washable, low VOC, and self-priming on most existing surfaces. In a busy household or commercial office corridor, the extra durability from a higher-gloss finish is worth it.

    For an office setting specifically, Ecologic holds up just as well, and the low-odour formula means you can get a repaint done over a weekend without the space being unusable on Monday.


    home exterior paint


    Exterior Siding, Stucco, and Trim

    Painting the outside of a home or building is a different undertaking entirely. Exterior paint has to survive rain, UV exposure, temperature swings, and in many parts of Canada, everything from summer heat to below-freezing winters. A paint that's not formulated for those conditions won't just look bad in a few years. It will fail.

    Guardian is Cloverdale's ultra-premium exterior acrylic finish, and it's built for exactly these demands. It uses X-Link Technology, a cross-linking chemistry that creates a harder, tighter film as it cures, giving it exceptional resistance to dirt, fading, and moisture. One of the features that genuinely matters for Canadian painting seasons: Guardian has early water resistance and low-temperature capability, which means you can apply it in cooler conditions than most exterior paints allow. That extends the window of time each year when exterior work is actually possible.

    Guardian comes in flat, satin, and semi-gloss finishes. For siding and walls, a flat or satin finish is typical. For trim (the decorative boards around windows, doors, and corners), a semi-gloss gives a cleaner look and holds up to more contact.

    Before any exterior paint goes on, the surface needs to be clean, dry, and in good condition. That means washing off dirt, mould, and old chalky paint; scraping anything that's peeling; filling cracks or gaps with appropriate caulking; and letting everything dry completely. On bare wood, a primer is essential before the topcoat.

    One rule of thumb most experienced painters follow: do not paint in direct afternoon sun or in temperatures below 10°C. The surface heats up or stays too cold, and the paint won't cure properly.


    Decks, Fences, and Exterior Wood Structures

    Wood outdoors is one of the trickiest surfaces to maintain. It expands and contracts with temperature and moisture. Foot traffic and UV exposure wear it down fast. And when a regular paint fails on a deck, it doesn't just fade. It peels in sheets, which is a much bigger fix than starting with the right product in the first place.

    This is exactly why decks and fences often do better with a solid stain than with conventional paint. A solid stain (sometimes called a solid hide stain) is a thick, opaque coating that penetrates the wood fibres rather than sitting on top of them as a surface film. Because it works with the wood's natural movement instead of against it, it's far less likely to crack and peel over time.


    stained wooden deck


    SharkSkin Deck & Siding Stain is Cloverdale's purpose-built product for these surfaces. It uses hybrid waterborne alkyd technology, which combines the durability and penetrating quality of traditional oil-based stains with the easier application and cleanup of a water-based product. It's available in two formats: Solid Hide for an opaque, paint-like finish (good for older decks or fences that need full coverage), and Translucent for surfaces where you want to preserve the natural wood grain while still adding colour and protection.

    SharkSkin is designed to hold up on both horizontal surfaces (decks, pool surrounds, stairs) and vertical ones (fencing, siding, pergola posts), which makes it a versatile choice for any wood project on your property.

    Prep for a deck matters a lot. Old, failing stain should be stripped before recoating. A clean, dry surface in good condition is what allows SharkSkin to bond properly and last through multiple seasons. The SharkSkin line includes a dedicated Wood Cleaner and Brightener, which removes old discolouration and opens up the wood grain before staining.


    The Prep Work That Applies Everywhere

    Whatever you're painting, three things apply across the board.

    1. Clean the surface first. Dust, grease, dirt, and old chalk prevent paint from bonding. Interior walls need a wipe-down. Exterior surfaces need a proper wash and time to dry fully.
    2. Fill and repair before you paint. Nail holes, cracks, and dents in walls or trim should be filled, sanded smooth, and wiped clean before any paint goes on. Painting over damage doesn't hide it. It highlights it.
    3. Use a primer when the situation calls for it. New or bare surfaces, heavily patched areas, stained spots, and dramatic colour changes (going from a dark colour to a very light one, or the other way around) all benefit from primer. It gives the finish coat the best possible surface to bond to.


    How Much Paint Do I Need?

    A rough rule: one litre of paint covers about 10 to 12 square metres with a single coat. Most projects need two coats.

    To estimate your wall area, multiply the width of each wall by its height, then add the results. Subtract a couple of square metres for each large window or door if you want to be precise.

    Textured or very porous surfaces (stucco, rough wood, concrete block) will absorb more paint, reducing the coverage estimate. When in doubt, buy a little extra. A half-used can is far less frustrating than running short mid-wall.


    Start with a Conversation, Not a Can

    The most confident DIYers don't have all the answers before they start. They ask the right questions early: What surface? What space? What finish? How much?

    Bring those questions to your nearest Cloverdale Paint store. Bring a photo if you can. The team there can help you match the product to the space, pick the right sheen for the right room, and put together a supply list that covers everything you need before day one.

    Start right, and the project takes care of itself.

  • Why Is My Paint Peeling? Causes & Fixes That Last

    by Jerwin Bautista | Jun 04, 2026

    You spent the time, did the work, and the paint still came apart on you. Whether it's a bathroom ceiling lifting in sheets, trim that's bubbling after one season, or siding that didn't survive its first Canadian winter, there's nothing more frustrating than watching a paint job fail.

    Here's the thing: paint doesn't just peel on its own. It's always reacting to something. And the only way to fix it for good is to figure out what that something actually is.

    Let's walk through the most common causes and exactly what to do about each one


    PEELING IS A SYMPTOM, NOT THE PROBLEM

    Before you reach for the scraper, it helps to understand what "peeling" is really telling you. In most cases, paint fails for one of three reasons: moisture it can't escape, a surface it never properly bonded to, or a paint film that got too brittle to flex with the substrate beneath it.

    Fix the symptom without fixing the cause, and you'll be back here next spring doing it all over again.

    Here are the five root causes that account for the vast majority of peeling paint in Canadian homes.


    MOISTURE (THE MOST COMMON CAUSE BY FAR)

    In Canada, moisture is the number one reason paint lets go. It shows up in two ways:

    Outside in: Rain, ice, and snowmelt work through exterior walls, failed caulking, or leaky rooflines and get trapped behind the paint film.

    Inside out: Humid air from kitchens, bathrooms, and laundry rooms pushes through walls and hits a paint film that has nowhere to go.

    Exterior peeling near windows, soffits, or along siding seams usually points to water infiltration. Interior peeling in bathrooms or along exterior-facing walls often means moisture is migrating from inside the building.

    The freeze-thaw cycle makes everything worse. Water trapped behind a paint film expands when it freezes. That pressure will eventually win. What looks like a spring paint problem usually started accumulating the previous fall.

    Oil-based and alkyd paints are especially vulnerable. Because they form a less permeable film than water-based acrylics, moisture that gets in behind them has nowhere to go except up, taking the paint with it as blisters that eventually peel.

    The fix:

    Deal with the source first. Repair caulking, clear gutters, check flashings, and add exhaust fans or a dehumidifier to high-moisture spaces like bathrooms and basements.

    Once moisture is addressed, scrape off all loose and blistered paint. Sand edges smooth and prime any bare areas.

    Repaint with a top-quality acrylic latex. Acrylic latex breathes better than oil-based coatings, allowing water vapour to escape without compromising the film.
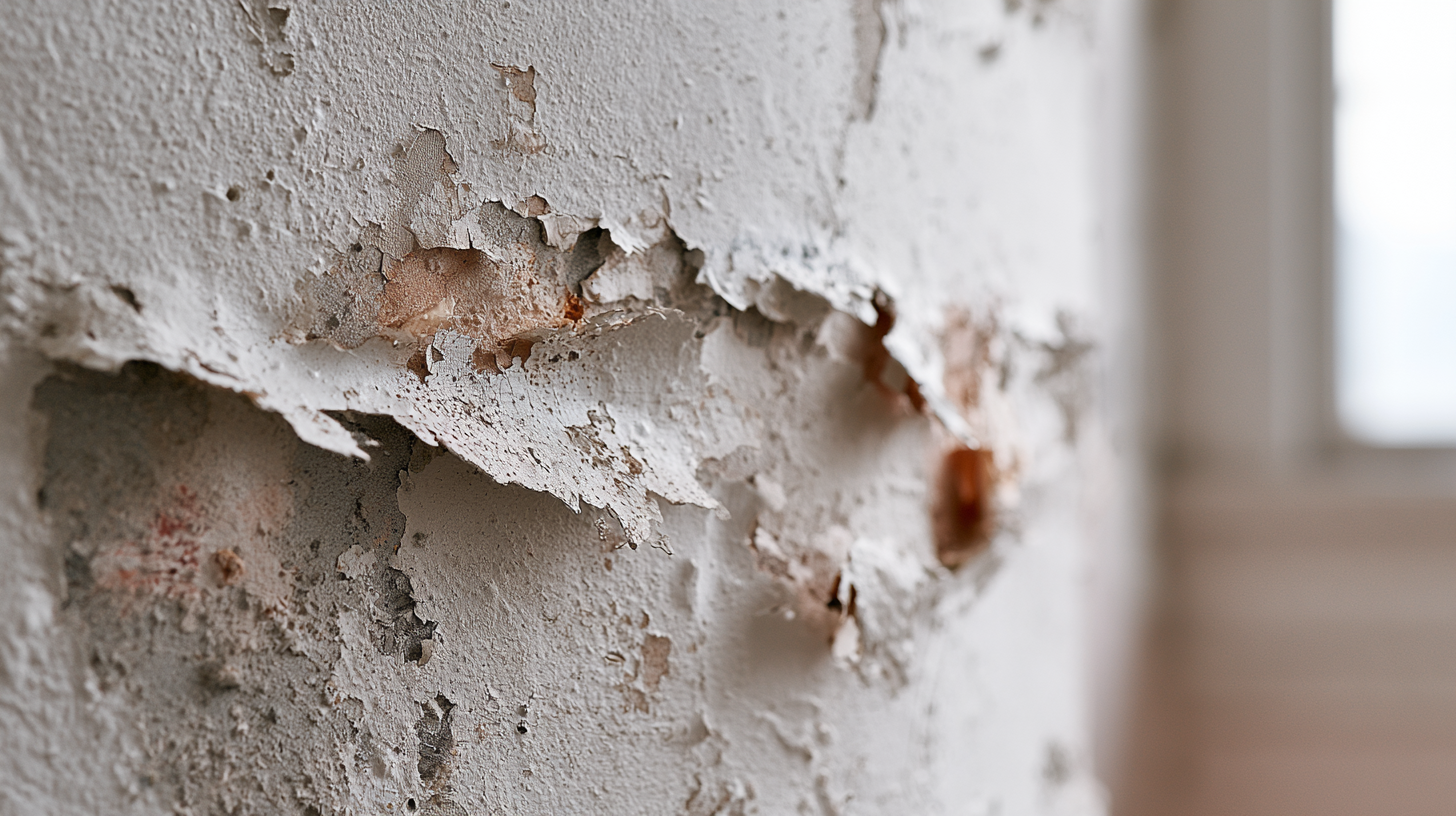
     

    freeze thaw damage

    Paint peeling off drywall is a sign of adhesion failure — not just a cosmetic problem.


    INADEQUATE SURFACE PREPARATION

    Poor prep is the second most common cause, and the one most people rush past. Paint needs a clean, sound, slightly abraded surface to grip. Anything between the paint and the substrate - grease, soap residue, dust, or chalky old paint - will compromise that bond from day one. You may not see it for months, but the failure is already written in.

    This comes up a lot in kitchens, where cooking oils leave an invisible film on walls, and in bathrooms, where cleaning products leave a waxy residue. Painting over a glossy surface without scuff-sanding is another common offender. The new coat has nothing to grab onto.

    The fix:

    Clean surfaces thoroughly. Degrease kitchens; clean and dry bathrooms fully before painting.

    Scuff-sand any glossy surfaces to give the new coat mechanical grip.

    If the existing paint is flaking in multiple layers down to bare substrate, use a filler to level the surface, feather the edges smooth, and prime before recoating.


    MISSING OR WRONG PRIMER

    Skipping primer is one of the most reliable ways to create a future peeling problem. A good primer seals porous surfaces so the topcoat doesn't sink in unevenly, improves adhesion on tricky substrates, and gives your topcoat something consistent to hold onto. Without it on bare wood, bare drywall, or a repaired patch, you're setting yourself up for failure.

    The right primer matters just as much as using one at all. High-humidity spaces like bathrooms need primers designed for those conditions. Bare wood on exterior trim needs a primer that can penetrate and seal the grain. Going back over a stain or a severe colour change without proper primer coverage puts your topcoat at risk from the start.

    The fix:

    Always prime bare or repaired areas before repainting, no exceptions.

    Match the primer to the conditions. High-moisture rooms, tricky surfaces, and bare wood all have specific needs.

    Browse Cloverdale's Primers & Sealers range, or ask a store associate which product is right for your surface.
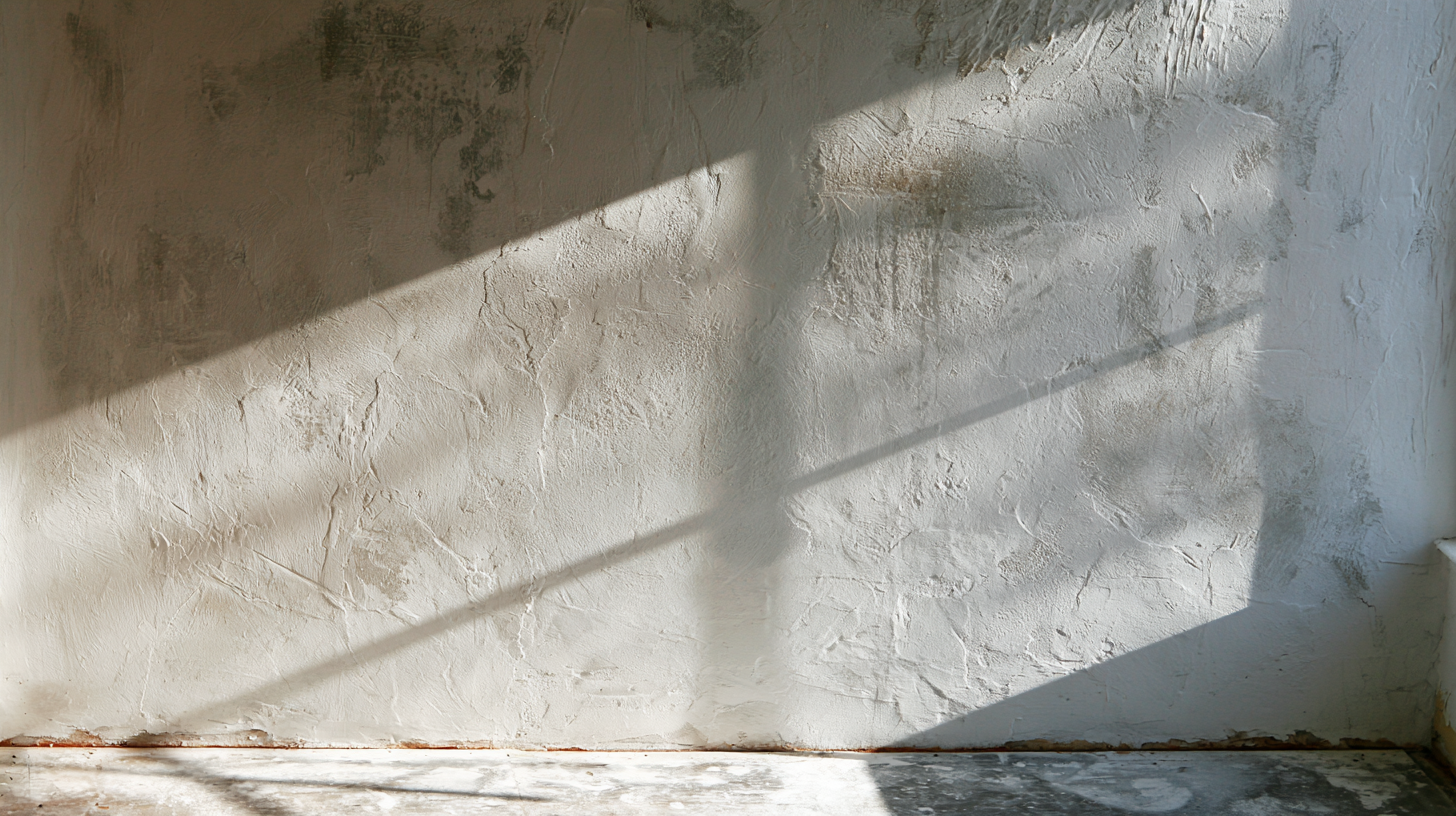
     

    wall primer

    Good prep work is what separates a paint job that lasts from one you'll redo in two years.


    LOWER-QUALITY PAINT

    Not all paints behave the same way over time. Lower-quality formulations typically contain less binder, which is the ingredient that holds the pigment together and bonds the film to the surface. Less binder means less flexibility, and less ability to expand and contract with the seasonal movement Canadian homes go through every single year.

    Older alkyd-based paints also tend to harden and become brittle as they age. What started as a flexible film eventually cracks, first as fine hairlines, then as flakes, and eventually as the full-scale failure where paint lifts off in sheets.

    The fix:

    When repainting, choose a top-quality acrylic latex. The acrylic binder stays flexible through temperature cycling, resists moisture, and delivers significantly better adhesion than standard grades or old alkyd formulations.

    The quality of what you put on at the start determines how much prep work you'll be doing a few years from now.


    PAINTING IN THE WRONG CONDITIONS

    Applying paint in temperatures that are too cold, over a surface that's damp, or in direct afternoon sun are all shortcuts to adhesion failure. In Canada, this most often happens in shoulder-season painting. An October afternoon can feel perfectly fine for a coat, but if temperatures drop overnight before the paint has cured, you have a problem.

    Latex paint applied below roughly 10°C (50°F) doesn't form a film properly. It looks normal at first, but performs poorly and often peels within a season.

    Painting over a wet or damp surface, especially with oil-based paints, leads directly to blistering and peeling. Moisture trapped under the film will push its way out through the softest point it can find.

    The fix:

    Check both the air temperature and the surface temperature before you start, and look at the overnight forecast too.

    Never apply paint to a wet or damp surface. Follow the product's stated application temperature range, and allow proper dry time between coats.
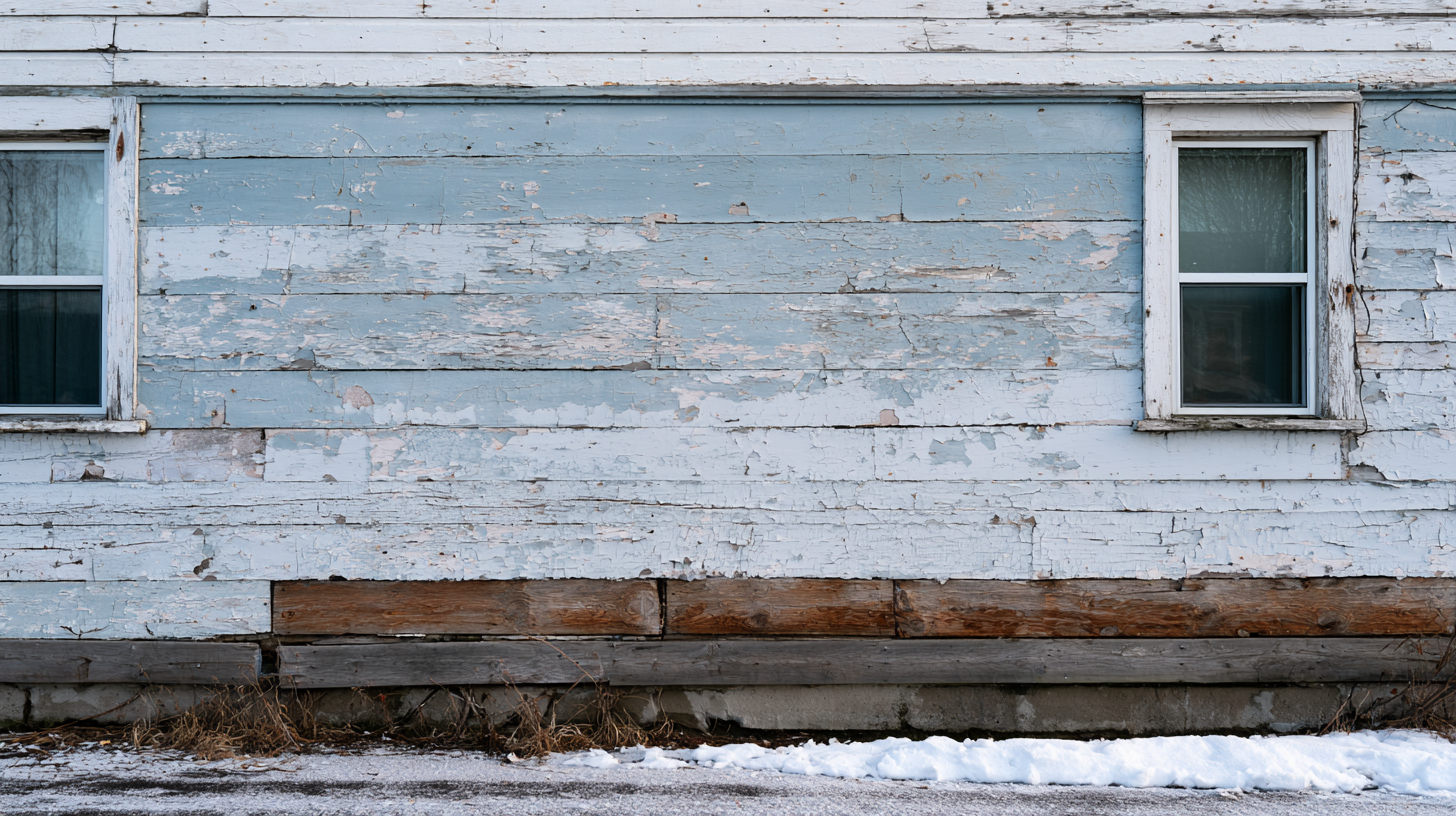
     

    exterior paint peel bare wood

    One Canadian winter is enough to expose any weakness in surface prep or paint quality.


    THE REPAIR SEQUENCE THAT ACTUALLY WORKS

    Whatever the cause, the repair process always follows the same order:

    • Step 1: Fix the source. Moisture, ventilation, or surface contamination - deal with the underlying problem before repainting. Otherwise, you're just covering the issue.
    • Step 2: Remove all loose material. Scrape and wire-brush every bit of lifted, flaking, or blistered paint. Painting over loose paint means the new coat will just come off with the old one. Sand the edges of any scraped areas smooth and feather them flat.
    • Step 3: Prime every bare spot. Bare wood, bare drywall, and bare masonry all need primer before topcoat. For larger repairs or multi-layer failures, a filler may be needed first to level the surface.
    • Step 4: Repaint with the right product. For exterior surfaces, use a top-quality acrylic latex exterior paint built for adhesion and water resistance. For kitchens and bathrooms, choose a product rated for high-humidity environments.

    Done in this order, a properly repaired paint failure should last the life of the paint job.


    A NOTE ON PAINTING IN CANADA

    Canadian homes face conditions that most products sold in warmer markets aren't really designed around. High indoor humidity during long winters, wide seasonal temperature swings, and the constant freeze-thaw stress on exterior surfaces mean that surface prep and paint quality matter more here than almost anywhere else.

    Basements in Ontario and Manitoba. Coastal bathrooms in BC. Exposed south-facing siding in Alberta. Each comes with its own vulnerabilities, and each one rewards you for getting the prep right and using a paint with real flexibility and breathability built in.

    This is why top-quality acrylic latex consistently outperforms lower-grade paints and older oil-based formulations in Canadian climates. The ability to flex with a substrate and let moisture out without failing isn't a nice bonus. In this climate, it's the whole point.

    Not sure which primer or topcoat is right for your specific situation? The team at your nearest Cloverdale Paint store can walk you through it. Find a location near you at cloverdalepaint.com/store-locations.
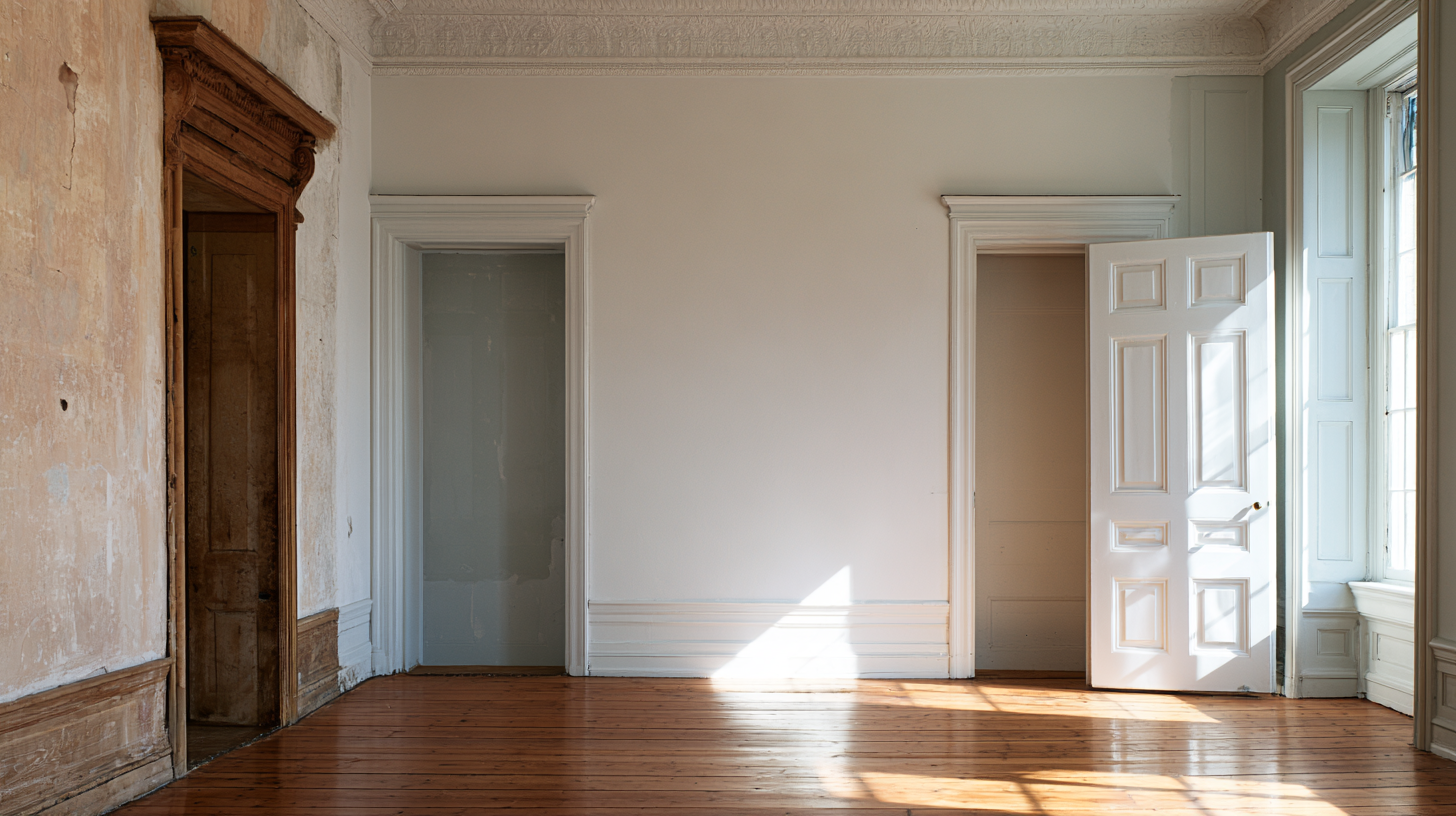


    bare wall prep

    The right primer, the right paint, and proper prep — that's what a lasting finish actually looks like.


    FREQUENTLY ASKED QUESTIONS

    Q: Why is my paint peeling off the walls in my bathroom?

    Bathroom paint peeling is almost always caused by moisture. Steam and humidity from showers hit the paint film repeatedly, and if the surface wasn't properly prepped, wasn't dry before painting, or wasn't primed for high-humidity conditions, the film loses its grip and starts to lift. Remove all loose paint, improve ventilation (a good exhaust fan helps a lot), prime bare areas, and repaint with a quality acrylic latex suited to wet spaces.

    Q: Why is my exterior paint peeling after one winter?

    Exterior paint that fails after a single Canadian winter usually comes down to one of three things: moisture getting in through failed caulking or damaged flashing; paint that was applied when it was too cold, or the surface was too wet to bond properly; or a lower-quality paint that couldn't handle the freeze-thaw cycle. The repair starts with fixing whatever lets moisture in, then scraping back to the solid substrate, priming, and repainting with a top-quality acrylic latex exterior paint.

    Q: Do I need to remove all the peeling paint before repainting?

    Yes, all of it. Painting over loose or peeling paint is one of the most common causes of repeat failure. Any paint that has lifted, blistered, or lost adhesion needs to come off before you repaint. Scrape it back, sand the edges smooth, prime any bare areas, and then apply your topcoat. Skipping this step means the new paint will be pulled off by the old failing paint underneath.

    Q: What is the difference between peeling, blistering, and cracking paint?

    They're related, but they're not the same thing. Blistering is usually the first stage - bubbles form when moisture or solvent vapour gets trapped under the film, causing localized loss of adhesion. Left alone, those blisters break down, and the paint starts to peel, separating from the surface in larger sections. Cracking and flaking start inside the paint film itself. The coating (often an older alkyd) becomes brittle, develops hairline cracks, and eventually flakes off. Moisture drives blistering and peeling; paint age and flexibility drive cracking and flaking.

    Q: Can I paint directly over peeling paint if I use a strong primer?

    No. Primer improves adhesion to a sound, clean surface -- it can't bond over loose or failing paint. Any area that is actively peeling, blistered, or flaking has to be scraped back to a solid surface before primer goes on. Two coats of primer over a compromised surface will still fail, along with the unstable layer underneath. Remove the problem first, then prime.

    Q: Why does paint peel more in Canada than in warmer climates?

    A few things compound here that don't compound the same way elsewhere. High indoor humidity during long sealed winters, dramatic seasonal temperature swings, and repeated freeze-thaw stress on exterior surfaces together put pressure on any weakness in preparation, moisture control, or paint quality. When water gets behind a paint film and freezes, it expands -- and that physical force will eventually break adhesion. A top-quality acrylic latex, which is flexible enough to move with the substrate and permeable enough to let vapour out, handles these conditions significantly better than older or lower-grade formulations.

  • The Paint Sheen Guide Every Canadian Homeowner Needs

    by Jerwin Bautista | May 12, 2026

    When you're standing at the paint counter, you've probably been handed a colour chip and asked, "And which sheen are you thinking?" It's a simple question that can send even seasoned renovators into a quiet panic. The difference between eggshell and pearl, or between semi-gloss and gloss, isn't just cosmetic; it affects durability, cleanability, how the light moves across your walls, and how long your paint job actually lasts.

    At Cloverdale Paint, we use a consistent sheen numbering system, GL1 through GL7, across our full product line. Once you understand how this ladder works, choosing the right finish for every room becomes straightforward. Here's how to read it.


    FIRST: WHAT DOES "SHEEN" ACTUALLY MEAN?

    Sheen refers to how much light a dried paint film reflects. It's measured in gloss units (GU) at a specific angle, typically 60 degrees against the wall. The higher the number, the more light bounces back at you. Lower sheens absorb more light, which visually softens a surface and disguises small imperfections like nail pops, uneven plaster, or roller texture. Higher sheens reflect more light, making a surface look crisp and bright, but they'll also reveal every bump and brush stroke if the wall hasn't been properly prepared.

    This is why sheen isn't just an aesthetic choice. It's a practical one, driven by traffic, moisture, and the condition of your walls.

    "Lower sheens forgive imperfect walls. Higher sheens forgive imperfect cleaning. The art is matching the right one to the right room."


    window light against walls


    CLOVERDALE PAINT'S SHEEN LADDER: ALL SEVEN LEVELS EXPLAINED

    The following guide uses Cloverdale Paint's official GL classification system, with gloss readings taken at 60 degrees as noted on our product labels.


    GL1 — Flat / Matte (Mat)

    2–4 gloss units @ 60°

    The lowest sheen in the range: absorbs almost all light, hiding surface flaws beautifully. Not the most washable, but unmatched for creating a soft, velvety depth of colour. A designer favourite for formal rooms and ceilings.

    Best for: Ceilings, formal dining rooms, adult bedrooms, feature walls.


    GL2 — Eggshell (Coquille d'œuf)

    6–8 gloss units @ 60°

    The most popular interior finish in Canadian homes, and for good reason. It has just enough sheen to be wipeable, but still looks soft and non-commercial on the wall. Think of the subtle lustre on the outside of an eggshell; that's exactly what you're getting.

    Best for: Living rooms, bedrooms, home offices, low-traffic hallways.


    GL3 — Pearl (Perle)

    14–16 gloss units @ 60°

    Where Eggshell ends and performance begins. Pearl has a noticeably silkier look than eggshell and handles moisture significantly better, which is why it appears as "Satin" on Cloverdale's exterior product labels. It's the workhorse finish for busy households.

    Best for: Children's rooms, active hallways, powder rooms, laundry rooms, exterior walls.


    GL4 — Low Gloss (Lustre faible)

    25–30 gloss units @ 60°

    The entry point into the trim family. Low Gloss sits between the wall finishes and the high-performance coating range, slightly shinier than Pearl but with noticeably better hardness and scuff resistance. Often used on interior millwork and built-ins when you want a refined look without a full gloss.

    Best for: Millwork and built-ins, cabinetry, interior doors in low-traffic formal spaces.


    GL5 — Semi-Gloss (Semi-lustre)

    45–50 gloss units @ 60°

    The standard choice for trim, doors, and window casings in Canadian homes. Semi-Gloss is hard, moisture-resistant, easy to wipe clean, and bright enough to make architectural details pop against the wall. If you're only choosing one trim finish, this is it.

    Best for: Baseboards and trim, interior doors, window casings, kitchens, and bathrooms.


    GL6 — Gloss (Lustre)

    76–80 gloss units @ 60°

    A high-performance, high-reflectance finish for surfaces that take real punishment. Gloss creates a lacquer-like appearance on doors and cabinets and stands up to repeated washing and contact. It demands thorough surface preparation; every imperfection will show, but when done right, it looks exceptional.

    Best for: Kitchen cabinets, exterior doors, high-traffic interior doors, commercial millwork.


    GL7 — High Gloss (Lustre haute)

    85–90 gloss units @ 60°

    The highest gloss in the range, used in specialty applications, professional finishing environments, and wherever a near-mirror finish is required. Not typically used for residential walls.

    Best for: Specialty applications, furniture and cabinetry (factory finishing), commercial interiors.


    A NOTE ON THE NAME THAT TRIPS EVERYONE UP

    You'll notice that our GL3 is called "Pearl" on interior products, but the same sheen level is labelled "Satin" on exterior products. This isn't a different finish; it's the same gloss range (14–16 GU @ 60°), just marketed under the name most familiar to exterior painting customers. If a contractor or paint advisor mentions "Satin" for an outdoor project and "Pearl" for indoors, they're referring to the same performance level.


    moody kitchen cabinets


    ROOM-BY-ROOM: A DESIGNER'S CHEAT SHEET

    Here's how to approach sheen selection for a typical Canadian home: factoring in traffic, moisture, light quality, and the most common surfaces found room by room.


    Ceilings (all rooms): Recommended: GL1 Flat

    Flat eliminates light bounce and can hide seams. Always use flat on ceilings.

    Living room walls: Recommended: GL2 Eggshell

    Low traffic, low moisture — eggshell provides a sophisticated, washable finish without looking commercial.

    Bedrooms (adult): Recommended: GL1–GL2 Flat or Eggshell

    Calm, non-reflective. Flat suits walls in good condition; eggshell if you want easier cleaning.

    Children's rooms: Recommended: GL3 Pearl

    Crayon, handprints, and scuff marks are unavoidable. Pearl wipes clean far better than eggshell.

    Hallways and mudrooms: Recommended: GL3 Pearl

    The highest-traffic walls in your home. You need the durability and cleanability that pearl delivers.

    Kitchen walls: Recommended: GL3–GL5 Pearl to Semi-Gloss

    Splatter, grease, and steam demand a washable finish. Pearl for upper walls; semi-gloss near cooking areas.

    Kitchen cabinets: Recommended: GL5–GL6 Semi-Gloss or Gloss

    Cabinets take daily contact and need a hard, wipeable film. Semi-gloss is standard; gloss for a lacquered look.

    Bathroom walls: Recommended: GL3–GL5 Pearl to Semi-Gloss

    Moisture resistance is the priority. In powder rooms, pearl is fine; in full bathrooms, step up to semi-gloss.

    Trim, baseboards, and casings: Recommended: GL5 Semi-Gloss

    The default trim finish across Canada for good reason. It's bright, crisp, scuff-resistant, and easy to touch up.

    Interior doors: Recommended: GL5 Semi-Gloss

    Doors are touched constantly. Semi-gloss handles it. Use gloss only when you want a statement door.

    Exterior siding: Recommended: GL3 Satin (Pearl)

    Satin is the standard exterior wall finish, flexible enough for Canada's freeze-thaw cycles, resistant to mildew and UV fading.

    Exterior doors and trim: Recommended: GL5–GL6 Semi-Gloss or Gloss

    Curb appeal and durability. A gloss front door makes a strong design statement and is easy to wipe clean.


    Designer's note on sheen contrast:

    One common design technique is to paint your walls in Flat or Eggshell, then apply the same colour but in Semi-Gloss on the trim. The result is a subtle tonal contrast that gives the room a finished, layered quality without introducing a second colour. It's particularly effective in hallways and bedrooms where you want the architecture to read clearly without visual noise.

    light in hallways


    WHAT SHEEN CAN'T FIX — AND WHAT IT CAN

    A common mistake is choosing a higher sheen to solve a surface problem. If your walls are rough, uneven, or poorly patched, gloss paint will not smooth them out; it will make every imperfection more visible. Sheen affects how light interacts with the film, not the texture underneath it.

    If you're dealing with rough walls or textured ceilings, your best tool is a flat finish paired with proper surface preparation, filling, sanding, and priming. Once the surface is right, the sheen choice is purely about performance and look.

    Conversely, sheen can genuinely transform the performance of a painted surface. A hallway painted in eggshell will start to show grimy marks within a year of heavy use. The same hallway in Pearl will wipe clean season after season. The right finish protects your investment in the paint job itself


    THE ONE SHEEN MISTAKE ALMOST EVERYONE MAKES

    Using the same sheen on walls and trim. It's an easy shortcut: buy one sheen, apply it everywhere, but the result is a flat, undifferentiated look that makes a room feel unfinished. Architecturally, trim exists to define and frame a space. When it's painted as the same sheen as the wall behind it, it disappears into the background.

    The traditional separation is: low sheen on walls (GL1–GL3), higher sheen on all woodwork and trim (GL4–GL6). This contrast is what gives a professionally painted room its clean, resolved quality.


    blue home exterior


    FREQUENTLY ASKED QUESTIONS

    Q: What is the difference between Eggshell and Pearl paint finishes?

    Eggshell (GL2) measures 6–8 gloss units and has a very soft, low sheen, ideal for living rooms and bedrooms where you want a clean, matte-adjacent finish that's still washable. Pearl (GL3) measures 14–16 gloss units and has a noticeably silkier appearance with better moisture resistance. Pearl is the right step up for busier spaces, children's rooms, and anywhere with higher humidity or more contact.


    Q: What paint finish should I use in a bathroom in Canada?

    For a full bathroom with a shower or tub, use Pearl (GL3) at a minimum, but Semi-Gloss (GL5) is the more common and more protective choice. The higher moisture levels in Canadian bathrooms, combined with cold, dry winters that cause condensation cycling, mean you want a finish with genuine water resistance. For a powder room (no shower), Pearl is perfectly adequate.


    Q: Is flat paint the same as matte paint?

    In Cloverdale Paint's system, both "Flat" and "Matte" refer to GL1, the lowest sheen level, measuring 2–4 gloss units. The term "Flat" is used on conventional interior products; "Matte" is often used for high-performance flat formulations (HP Flat). The gloss level is identical. Always check the GL code on the label if you're matching products.


    Q: Should I use semi-gloss or gloss on trim and doors?

    Semi-Gloss (GL5, 45–50 GU) is the standard choice for most Canadian homes — it delivers a clean, bright finish on trim and doors that wipes down easily without demanding perfect surface preparation. Gloss (GL6, 76–80 GU) produces a more lacquer-like appearance and is more durable, but it will clearly show any surface flaws, so walls and trim need to be very well prepared beforehand.


    Q: What is Low-Gloss paint used for?

    Low Gloss (GL4, 25–30 GU) sits between the wall finishes and the traditional trim range. It's most often used on millwork, built-in cabinetry, and interior woodwork where a designer wants a refined look without the high reflectance of semi-gloss. It's also a good choice for interior doors in formal spaces — living rooms, libraries, studies — where a full semi-gloss would look too commercial.


    Q: Does paint sheen affect colour?

    Yes, noticeably. Higher sheens intensify the perceived depth and saturation of a colour because the reflective film bounces more light back to the eye. A dark navy in semi-gloss will look richer and more saturated than the same colour in flat. This means that if you're testing paint samples on your wall (which you always should), make sure the sample is applied in the sheen you intend to use — otherwise the final result may look different from what you approved.


    CHOOSING YOUR SHEEN AT THE STORE

    When you're ready to choose, bring your room dimensions, note the room's function and light exposure, and let your Cloverdale Paint advisor know whether you're dealing with walls in good condition or surfaces that need more forgiveness. The GL level is printed clearly on every Cloverdale product label — it's the most reliable way to ensure you're getting a consistent finish, especially if you're mixing products across a project.

    If you're unsure where to start, the most versatile combination for a typical Canadian home interior is: Flat or Eggshell on walls, Pearl in kitchens, bathrooms, and hallways, Semi-Gloss on all trim and doors. That pairing covers the vast majority of residential needs and has been a professional standard for decades.

    Our in-store sheen display shows all seven finish levels side by side on the same colour by our Colour Chip twoers, which is the clearest way to understand the difference before you commit.

    Find your nearest Cloverdale Paint location at cloverdalepaint.com/store-locations.

  • How to choose paint colours for your first home (now that the walls are actually yours)

    by Jerwin Bautista | Mar 24, 2026

    TL;DR: Owning your first home is the perfect time to move past temporary "renter" fixes and build a cohesive, long-term vision starting with a whole-home colour strategy. By prioritizing a consistent undertone and treating surfaces like trim and ceilings as intentional design elements, you can create a professional flow that connects every room. For high-impact updates, skip the massive renovation and opt for a "system" approach—using specialized products like Renaissance for cabinets and Kitchen & Bath for high-moisture walls ensures a durable, professional-grade finish that lasts for a decade.


    There is a specific kind of awe that comes with closing on your first home. You walk through the empty rooms, knock on the walls just to hear them, and feel the full weight of it: this is yours. Then the awe gives way to a slightly panicked question — now what?


    Most first-time homeowners fall into one of two traps. They either freeze up and live in builder-white limbo for two years, or they go room by room on impulse and end up with a house that feels disconnected, like a furniture showroom with no point of view. The fix for both is the same: start with a whole-home colour strategy, and ground it in paint. Not furniture. Not throw pillows. Paint (not just because we're a paint company.)


    One Vancouver-area homeowner walked into the bedroom of their newly purchased home for the first time, and the previous owners had left their mark in a big way. The west wall was fully panelled and painted a deep emerald green, offset by greige on the rest of the walls. It sounded like a bold, considered design choice. In practice, with a single north-facing window positioned high on the wall and minimal overhead lighting, the room felt half its actual size: dark, closed-in, and more like a cave than a retreat.


    The solution didn't require a renovation; it needed a rethink. They swapped the greige for Artisan White CA013 across the main walls, which immediately pushed the room open, bouncing what little natural light existed from corner to corner. For the feature wall, rather than abandoning the idea of depth entirely, they landed on Soapstone CA034, a soft, cool-toned neutral that kept the visual interest of a distinct feature wall without competing with the limited light. The result was a room that finally felt like somewhere to wake up in rather than somewhere to escape from.


    empty_sunlit_living_room_in_a_newly_purchased_home


    Changing Your Mindset for Choosing Your First Home Colour

    Renting trains you to hedge. You choose colours that can be painted over, furniture you can move, and you make every decision with one eye on the door. 

    Ownership flips that entirely. The choices you make now compound. A thoughtfully chosen wall colour does not need to come down in two years. Quality window treatments earn their place over a decade. Good flooring holds and builds value.

    That said, no rule says you have to figure it all out on day one. Living in your new home for a few weeks before committing to major colour decisions is genuinely one of the smartest moves you can make. You will learn how light moves through the rooms, which spaces feel too open and which feel like they need grounding, and what the existing bones of the house are telling you about what belongs there.


    Start with a colour story for the whole home

    The clearest difference between homes that feel designed and homes that feel assembled is colour continuity. In a well-considered home, each room has its own personality and the colours still feel like they belong to the same family. You move from the entryway to the living room to the kitchen, and something connects, even when the individual colours are clearly distinct.

    That coherence comes from building your palette at the home level before you pick a single room colour. Start with one anchor neutral for shared and transitional spaces; the entryway, hallway, open-plan living areas, anywhere two rooms are visible at the same time. It needs to read consistently across changing light conditions and play well with everything around it.

    From that foundation, build outward. The living room can go deeper and more characterful. The bedroom can be more specific to your taste. The home office can get genuinely moody. The kitchen can take a risk. Each space earns its own atmosphere, but the shared undertone family keeps everything feeling like one home.


    Close-up_architectural_detail_of_freshly_painted


    Undertones: one thing that people usually miss

    Every paint colour, including whites and neutrals, has an undertone of warm (yellow, red, orange) or cool (blue, green, purple). Choosing colours from the same undertone family across your home is what creates cohesion without making every room identical. A warm greige entry, a warm sage living room, and warm terracotta in the dining room all work together because they share that warmth. Mix undertone families and the home starts to feel unresolved, even if every individual colour is beautiful on its own.


    Different parts of your home that you can go further with paint

    There is an entire category of paint decisions unavailable to renters, and they happen to be some of the most transformative ones.

    Trim and baseboards: the most underrated call in any room

    Standard trade practice is to paint all trim, baseboards, and door frames in a flat or satin white and leave it at that. That's fine, but it's generic. When you treat trim as a real design element rather than an afterthought, the character of a room changes without touching the walls.

    Having a bright white gloss trim against a coloured wall creates crisp, graphic definition and makes even basic moulding look intentional. Matching trim to wall colour in a higher sheen creates a seamless, enveloping effect that works especially well in spaces where you want to feel cocooned rather than defined. Dark trim on light walls is a bolder commitment, but in the right home, it's genuinely extraordinary.


    Ceilings are the fifth wall almost everyone ignores

    Flat white ceilings are so standard that most people do not realize they are making a design choice by leaving them alone. But it is a choice, and not always the only one.

    Going one to two shades lighter than the walls makes a room feel taller. Matching the ceiling to the walls in a flat finish creates warmth and intimacy, particularly effective in dining rooms and bedrooms. A bold ceiling colour above white walls is one of those moves that photographs beautifully and feels special to sit inside. Even swapping the cool, builder white for a warm white on the ceiling alone makes the whole room read differently.


    Cabinet painting: a weekend project with outsized impact

    If your kitchen came with solid wood or MDF cabinets in a colour that's not working, painting them is one of the highest-return updates you can make. The key is entirely in the preparation. Clean with a proper degreaser, sand lightly, apply a primer like our Prime Solution Bonding Primer, and use a cabinet-specific waterborne alkyd formula. That process takes a weekend. The result holds up over the years and can completely reframe your most-used room without a big renovation budget.

    For a professional cabinet finish, use a waterborne alkyd like Renaissance, which offers the durability of oil paint with the easy cleanup of water. Its self-levelling properties eliminate brush marks, though you should wait for a 30-day cure window before heavy scrubbing to ensure the finish fully hardens. On the surrounding walls and ceilings, switch to Kitchen & Bath to prevent mildew and resist the "burnishing" or shiny spots caused by frequent cleaning. Choosing a Pearl finish for these high-moisture areas creates a durable barrier that protects your drywall from steam far better than standard flat paints.


    Bright_kitchen_with_freshly_painted_warm_white


    How to choose the right paint finish for every surface in your home

    The sheen level of a paint finish affects how light reflects off a surface, how the colour reads, and how long it lasts. Using the wrong finish in the wrong place is one of the most common and easily avoided mistakes in a first home.

    • Living room walls: Eggshell. Washable, low sheen, colours read true.
    • Bedroom walls: Flat or eggshell. Flat is softer and more restful; use Eggshell if the room sees heavier use.
    • Kitchen and bathrooms: Pearl. Handles moisture and cleaning without looking plasticky.
    • Trim, doors, and baseboards: Semi-gloss. Creates contrast with walls, highly durable, and easy to wipe down.
    • Ceilings: Flat. Absorbs light, hides surface imperfections, never draws attention to itself.
    • Cabinets: Pearl. Needs to withstand daily contact and regular cleaning.


    How to select paint colours by room

    Each space has a function, a feeling, and a certain number of hours you spend in it. Let those things shape the colour direction rather than just pulling whatever looked good on a chip under store lighting.

    • Living room: Your highest-traffic social space. Warm neutrals and earthy tones carry broadly. This room can handle more depth than you might expect on one wall.
    • Kitchen: Often the hardest room to change structurally, so your colour choices are for cabinet paint and wall tone. Warm whites and soft, earthy greens tend to age especially well here and hold up as tastes shift.
    • Bedroom: Built for rest and restoration. Colours that lower visual stimulation, like cooler greens, dusty blues, or soft lavender, work wonders in bedrooms. A deep, saturated wall behind the headboard is one of the more signature homeowner moves you can make.
    • Dining room: Made for gathering, and one of the best rooms in the house to go bold. Deep, atmospheric tones like a saturated green, a dark wine, or a moody blue can make meals feel like occasions rather than just dinners.
    • Home office: Cooler greens and blues support focus. If the room doubles as a creative workspace, a more saturated, darker wall can make it feel like a genuinely dedicated environment rather than a corner of another room.


    Cloverdale Paint Colour Choices based on Rooms

    These are pulled directly from our ColorIs, Artisan, and Narrative collections, with three strong options and favourites per room, so you have a range rather than a single point to land on.

    Living Room

    • Timeless Taupe (EX014):  A warm, grounded taupe and one of the best whole-room anchor neutrals in the Narrative collection.

    • Greige (EX326): Exactly what a greige should be: neither grey nor beige, reads consistently across all lighting conditions.

    • Artifact (CA074) An earthy, warm tan with brown undertones creates an inviting environment.

    Bedroom

    • Tranquil (EX149) The name is earned. Soft, restful, and works beautifully in both good and limited natural light.

    • Solitude (EX150) A natural companion to Tranquil, slightly cooler and more enveloping, ideal for a feature wall behind the bed.

    • Simple Serenity (0614) A quiet dusty blue that consistently earns a place in any bedroom.

    BONUSDay Spa (0634) Our 2026 Colour of the Year earns a spot in any bedroom for a bolder look.


    Kitchen and Bathroom

    • Artisan White (EX077) Warmer and more livable than standard white, holds up well in rooms that get a lot of daylight.
    • Fern (EX055) A fresh, earthy green that is particularly strong paired with warm wood tones and natural stone.
    • Anise (CA155) A muted sage in the Artisan collection, one of Cloverdale's top greens and an excellent pairing with white cabinetry.

    Dining Room

    • Salish Sea (EX051) A deep, BC-inspired blue that is dramatic and distinctive — the kind of colour that makes a dining room feel like a destination.
    • Rainforest (EX058) Rich and moody, a green that creates real atmosphere and photographs exceptionally well in candlelit dinner settings.
    • Shiraz (EX117) A deep wine tone that brings genuine warmth and occasion to a gathering space.

    Once you decide on a colour story, every subsequent decision has a framework to work within. Here is how to think about the non-paint elements with the same long-term lens, based on how some of our customers used our paint. Always go with your personal preferences and find inspiration everywhere. Each home is meant to be unique to you, so take the below as thinking points, not facts.


    Finished_home_layered_and_lived-in_Lived-in_feel


    Invest where permanence and daily contact meet

    Built-in shelving, light fixtures, cabinet hardware, door handles, and window treatments are in your peripheral vision every single day and are worth buying at a quality level you will still appreciate in five years. The same goes for anything you physically interact with constantly: the sofa, the mattress, the desk chair. The decorative pieces that sit on a shelf and get admired once a week can come from anywhere.


    Think about what compounds over time, not just what looks good now

    Well-prepared and quality-painted walls last 7 to 10 years before needing a full repaint. Painted kitchen cabinets consistently rank among the highest-ROI updates in a first home. Properly maintained hardwood flooring builds resale value. None of this means every decision has to be made through a resale lens, but it is worth knowing that investing in your home's design is not purely spending. Some of it is building.


    The trio that transforms a room the fastest after painting

    A properly sized rug anchors furniture and defines zones in open-plan spaces in ways that nothing else quite replicates. Multiple light sources at different heights, floor lamps, table lamps, under-cabinet lighting; all these considerations add dimension and warmth that overhead-only lighting cannot achieve, regardless of bulb quality. And a few well-placed plants do something to a room that styled objects simply cannot: they add life. Even a single large plant against a deep wall colour changes the feeling of a space immediately.


    Build slowly and do not fill everything at once

    The homes that feel most considered are almost always the ones that came together across months and years rather than weekends. It's absolutely ok to leave a wall bare while you wait for the right piece. Buy one genuinely good chair instead of three adequate ones. Negative space is actively working in your favour; it makes the things you do choose feel deliberate. Patience is one of the more powerful decorating tools available, and it costs nothing.


    A quick checklist before you start:

    • Use your furniture to help you decide on paint colours. These items can help you catch different undertones. Bonus points if you can clear the space and then paint, making your project turn into an afternoon gig rather than a whole week's job.
    • Test every colour on the actual wall, as a large swatch, in your actual light, for a full day, morning and evening, lights on and off. No shortcuts here.
    • Choose a whole-home undertone direction before picking individual room colours. Warm or cool. Depending on the light direction, you can mix warm or cool colours (North-facing rooms = warmer tones, South-facing rooms = cooler tones)
    • Do not overlook trim. Freshly painted trim, even in the same white, changes a room. Decide on gloss or semi-gloss and keep it consistent throughout the house.
    • Buy better paint than you think you need to. Premium paint covers in fewer coats, holds up longer, and touches up invisibly. Budget paint does none of those things and usually costs more in the long run through additional coats and repairs.
    • Treat the ceiling as a real surface with real options. Even upgrading from a cool builder white to a warm white ceiling makes a whole-room difference that is hard to pinpoint but immediately felt.
    • Add layered lighting before you decide you dislike a paint colour. A room lit only from overhead almost never shows a colour at its best.


    Moody_dining_room_with_deep_blue-grey_walls


    Common Questions from First-Time Home Buyers about Paint

    What paint colours work best in a first home?

    Start with the whole home rather than one room. Choose a dominant neutral for shared and transitional spaces, then build outward into deeper, more expressive colours in rooms built for a specific mood, like the dining room, bedroom, or office.

    Warm greiges, soft sages, and earthy whites tend to be the most liveable and forgiving anchor choices. Testing large swatches on the actual wall before committing is non-negotiable, and keeping undertones consistent across rooms is what creates a home that flows.


    Should trim and ceilings be a different colour from the walls?

    Treating them as intentional design surfaces rather than structural leftovers is one of the highest-impact things you can do. Bright white semi-gloss trim against a coloured wall creates crisp architectural definition. Matching the ceiling to the walls in a flat finish creates warmth and enclosure.

    There is no single right answer, but leaving both as default builder white without considering the alternatives leaves real potential on the table.


    What is the best paint finish for walls, trim, and ceilings?

    Walls in living spaces: eggshell or flat. Kitchens and bathrooms: pearl or semi-gloss for moisture resistance. Trim, doors, baseboards: semi-gloss for durability and contrast. Ceilings: flat to diffuse light and hide surface texture.

    Using the appropriate finish in each location is what separates a room that looks professionally painted from one that just looks...painted.


    How do I make colours flow from room to room?

    One anchor neutral in shared spaces, plus supporting colours in individual rooms that all come from the same undertone family. The colours can be clearly different from each other; the consistency of their undertones is what creates the sense that they belong together.


    Is painting kitchen cabinets worth it?

    For most first homes with solid wood or MDF cabinets in good structural condition, yes. It ranks among the highest returns for your home investment, particularly in kitchens with dated or builder-default colouring. Keep in mind, the preparation makes or breaks the result: degrease, sand, prime with a bonding primer, and use a cabinet-specific alkyd formula, like our Kitchen and Bath. Done properly, it looks custom and lasts for years. Painting cabinets with shortcuts makes the paint chips within months.


    How long does quality interior paint last?

    On a properly primed and prepared surface, 7 to 10 years in most living spaces before a full repaint is needed. High-traffic corridors, kitchens, and children's rooms may need touch-ups sooner. Choosing a premium brand and the correct finish for each surface significantly extends that lifespan. The cost difference between standard and premium paint is a decade-level decision, not just an aesthetic preference. Don't just take our word for it, our customers speak for the quality and durability of our products for us (visit your nearest Cloverdale Paint and read our reviews!)


    When should I paint?

    Paint before you move in, if at all possible. That window will not come again without a full furniture-moving operation. For everything else, wait. A few weeks of actually living in the space almost always reveal how you use the rooms differs from how you imagined using them on a floor plan. Those insights are worth more than the head start on painting.


    Bottom line: colour choices for your home are just as important for long-term living.

    Decorating a home you own is a longer game than making a rental feel livable, and that is genuinely a good thing. You have the time to build it with intention, to make decisions that hold up over years, and to create something that reflects who you actually are rather than a version of yourself racing against a lease end date.

    Start with colour. Figure out your undertones. Test properly. Commit to the trim and ceiling as real surfaces. Put money where it compounds. Add things slowly and only when they are right.

    The space does not need to be finished. It just needs to start well. A great coat of paint on walls you actually own is exactly that kind of start.


    small_bedroom_with_high_and_small_north-facing


    About the author: our Marketing extraordinare, Jeremy, is a first-time homeowner based in Vancouver, and is now somewhat obsessively interested in how colour and light shape the experience of being inside a home. Currently choosing a dining room colour for the third time because the first two were "almost" right.


  • The Northern Light Effect: Why Paint Colours Look Different in Canada (and How to Fix It!)

    by Jerwin Bautista | Feb 12, 2026

    The Mystery of the "Perfect" Grey

    We have all been there. You spend hours scrolling through Pinterest or Instagram. You find a photo of a stunning, airy living room painted a chic, modern grey. It looks warm, inviting, and sophisticated. You find the exact colour name, rush to the store to buy a gallon, and paint your living room on a Saturday afternoon.

    But by Sunday morning, as the weak winter sun drifts through the window, that "chic grey" doesn’t look warm or inviting. It looks cold. It looks flat. In the corners, it might even look a little purple or like unmixed concrete.

    You didn’t make a mistake in your painting technique. You didn’t buy a bad batch of paint. You are simply dealing with a phenomenon that interior designers in California or Texas rarely have to worry about.

    You are dealing with The Northern Light.

    At Cloverdale Paint, we have been manufacturing paint in Western Canada since 1933. We know a thing or two about the Canadian climate. We know about the rain, the snow, and the freeze-thaw cycles that test our exterior stains. But we also know about the light.

    Living in the Northern Hemisphere—whether you are in a condo in downtown Toronto, a heritage home in Winnipeg, or a rancher in the Fraser Valley—changes the way colour behaves. The light here is unique. It is cooler, bluer, and for many months of the year, it is lower in the sky.

    If you are frustrated that your paint colours never look like the photos in magazines, this guide is for you. We are going to put on our "Designer Hats," strip away the complicated jargon, and teach you how to master the Northern Light to make your home feel cozy, even in the middle of February.


    a modern Canadian living room in winter, low-angle sunlight streaming through a large window, long dramatic shadows stretching across the floor, a cool blue atmospheric tint in the corners.


    The Science of Canadian Light (Simpler Than You Think)

    To pick the right colour, you have to understand the light source.

    In Canada, because we are situated far north of the equator, the sun doesn't beat down on us from directly overhead for most of the year. Instead, it hits us at an angle from the south. This angle does two critical things to the natural light entering your home:

    1. It filters the spectrum: As sunlight travels through more atmosphere to reach us (due to the low angle), the light waves scatter. By the time the light enters your north-facing window, it is indirect and leans heavily into the blue and grey end of the spectrum.
    2. It creates shadows: The lower sun casts longer shadows. This means the corners of your rooms are often darker than rooms in homes closer to the equator.

    Think of it like a camera filter. Imagine you took a photo of a beige wall. Now, imagine putting a sheer blue filter over that photo. What happens to the beige? It turns slightly green or muddy. If you put that same blue filter over a crisp white wall, the white turns cold and clinical.

    This is what Canadian daylight does to paint. It acts as a "Cool Filter."

    If you pick a paint colour that is already cool (like a blue-grey or a stark white), the Canadian light will amplify that coolness, making the room feel chilly. To counter this, we need to look at Undertones.


    The Secret Weapon: Understanding Undertones

    When you look at a paint chip, you generally see the "Masstone." That’s the main colour—Blue, Red, Grey, Green.

    But hiding underneath that main colour is the Undertone. This is the subtle influence of other colours mixed in.

    • A grey can have a blue undertone (Cool).
    • A grey can have a green undertone (Cool/Neutral).
    • A grey can have a violet undertone (Cool).
    • A grey can have a yellow or beige undertone (Warm).


    A split-screen comparison of two interior walls; the left side is a cold, flat clinical blue-grey, the right side is a warm, inviting greige with subtle yellow undertones.


    The Golden Rule for Canadian Homes: Because our natural light is generally cool (blue-leaning), you usually want to choose colours with warm undertones to balance it out.

    If you put a cool grey in a room with cool light, the room feels dead. If you put a warm grey (a "Greige") in a room with cool light, the warmth of the paint neutralizes the coolness of the light, and the result is a perfectly balanced, cozy grey.

    This is where many DIYers get tripped up. They buy a "True Grey" because they want that modern look. But in Canada, a "True Grey" almost always reads as blue on the wall. To get the look of a "True Grey" in our light, you actually need to buy a grey that looks slightly beige on the chip.


    The "White Paint" Trap

    The biggest trend in the last decade has been the "Gallery White" look. Bright white walls, white trim, minimalist vibes. It looks incredible in photos taken in Australia or California, where the sun is bright and warm.

    In Canada, painting a room stark white can be risky.

    White paint relies on reflecting light. If the light coming in your window is grey and gloomy (hello, November!), the white wall will reflect that gloom. A stark white room in Vancouver or Halifax during winter can feel like the inside of a refrigerator.


    A cozy breakfast nook painted in a creamy off-white like Candle CA007, warm morning light hitting the walls, a soft glow resembling candlelight, textures of linen and light wood, inviting and warm, highly detailed, realistic textures.


    How to do White right in Canada: You don't have to abandon the white trend! You just need to shift your selection. Instead of a stark, blue-white (often called "High Hide White" or generic base white), look for Off-Whites or Creamy Whites like Candle CA007 or Antique White EX288.

    Look for whites that have a tiny drop of yellow or red pigment in them. You won't see the yellow on the wall; your eye will just read it as "White." But that tiny drop of pigment adds a "candlelight" effect that counteracts the grey weather outside.

    Cloverdale Tip: When you are at the counter, ask to see the formula or ask the staff: "Does this white have any umber or ochre in it?" Those are the earth tones that bring the warmth we need.


    A Room-by-Room Orientation Guide

    Not every room in your house faces North. The direction your windows face (the orientation) dictates the light quality. Here is how to handle each one using the Cloverdale palette philosophy.

    1. North-Facing Rooms (The Challenge)

    These rooms never get direct sunlight. The light is consistent, but it is shadowless and cool.

    • The Mistake: Painting it blue, green, or stark white. These colours will look dreary.
    • The Fix: You need heat. Embrace warmer colours. If you want a neutral, go for a deep "Greige" (Grey-Beige) or a warm oatmeal colour. If you want colour, go for rich, saturated tones like terracotta, warm olive, or chocolate. Darker colours often work better in North-facing rooms because they embrace the coziness rather than trying to fight the lack of light.

    2. South-Facing Rooms (The Lucky Ones)

    These rooms get strong, direct light for most of the day. This light is warm and yellow.

    • The Freedom: You can get away with almost anything here.
    • The Strategy: Because the light is already warm (yellowish), you can actually use those cool blues and "True Greys" here. The warm sun will warm them up naturally. If you use a very warm colour (like a buttery yellow) in a south-facing room, it might feel a bit intense or "hot" in the summer.
    • Designer Tip: This is the best place to use those "Cool Whites" or icy pastels you’ve been dreaming of, like Dove's Wing 0537, Warm Grey CA091, or Cashew EX118.

    3. East-Facing Rooms (The Morning Glory)

    These rooms get bright, warm light in the morning (sunrise) but turn cooler and shadowy in the afternoon and evening.

    • The Considerations: When do you use the room? If it’s a bedroom, you’ll wake up to warm light. If it’s a living room you use after work, it will be cool.
    • The Fix: Greens and Blues with a hint of warmth (like a teal or a sage) look beautiful here. They look fresh in the morning light and retain their character in the cool afternoon. Our picks are: Blue Jay CA202, Blue Depths 0628, and Dark Navy EX162

    4. West-Facing Rooms (The Sunset Watchers)

    The opposite of East. These are shadowy in the morning but get hit with intense, hot, orange light at sunset.

    • The Considerations: The late-day sun can be glaring. It turns orange/red.
    • The Fix: Be careful with red or orange paint here—it will look overwhelmingly intense at 5:00 PM. Cooler neutrals work well here to tone down the heat of the sunset, creating a relaxing vibe for the evening. Some colours for you to choose from: Ground Sage EX031, Sagebrush CA153, Everlasting Sage 0422


    Don't Forget Artificial Light (Because it can get Dark at 4:30 PM)

    Let’s be honest. For a big chunk of the year, we aren't seeing our walls in natural sunlight at all. We are seeing them under lightbulbs.

    You can pick the perfect paint colour, but if you have the wrong lightbulbs, it will look terrible.

    Lightbulbs are measured in Kelvins (K).

    • 5000K (Daylight): This is very blue and bright. It mimics high-noon sun. In a home, this often feels like a hospital or a garage. It will make your warm paint colours look flat, and your cool colours look clinical. Avoid this for living spaces.
    • 3000K - 3500K (Soft White): This is the sweet spot for modern homes. It is white but friendly. It renders colour accurately without casting a heavy yellow or blue tint.
    • 2700K (Warm White): This mimics old incandescent bulbs. It is very yellow/orange. It makes rooms feel cozy, but it will change your paint colour. A light blue wall under 2700K light might turn slightly green.


    A modern Canadian open-concept living room at 4:30 PM dusk, walls painted in a warm greige.


    The Pro Move: Before you blame the paint, check your bulbs. If your grey walls look purple at night, your lightbulbs might be too cool. If your crisp white walls look dingy yellow at night, your bulbs might be too warm (2700K). Aim for 3000K LEDs for the most accurate colour representation.


    How to Test Paint Like a Designer

    This is the most important advice we can give you: Do not always trust the paint chip in the store.

    Our stores are lit with different lighting than you would normally use at home. The chip will look different in a store than it does on your wall.

    Also, do not paint a tiny 6-inch square in the middle of your wall. When you do this, you are looking at the new colour surrounded by your old colour. Your eye will "compare" the two. If you are painting a grey swatch over a yellow wall, the grey will look purple because your brain is trying to compensate for the yellow.

    The Cloverdale "Board Test" Method:

    1. Buy a Colour Tester: Pick up a small sample can of the colour you are considering.
    2. Get a Board: Buy a piece of white poster board or foam core (crafts or dollar store style).
    3. Paint the Board: Paint the entire board, edge to edge. Do two coats. Let it dry.
    4. Move it Around:
      • Place the board in your North-facing room. Look at it in the morning.
      • Look at it at noon.
      • Look at it at night with the lamps on.
      • Move it to a dark corner. Move it next to the window.

    This allows you to see the colour in isolation, without the distraction of your old wall colour. It also lets you see how the "Northern Light" changes the colour throughout the day. You might find that the "perfect beige" turns greenish at 4 PM. Better to know that before you paint four walls!


    The Cloverdale Difference – Why "Factory Direct" Matters

    Cloverdale Paint is a family-owned Canadian company. Our chemists and colour experts work in Surrey, British Columbia, and produce paint at facilities across the country.

    Because we are Factory Direct, the people you talk to in our stores are specialists. They aren't working in the plumbing aisle one hour and the paint aisle the next. They know our colour palette intimately. If you walk in and say, "My living room faces North, and everything looks blue," they know exactly which warm-undertone neutrals to pull for you.


    Conclusion: Embrace the Grey (But Paint it Warm)

    Living in Canada means embracing the seasons. We have snowy winters, rainy springs, and glorious, bright summers. Your home needs to feel like a sanctuary through all of them.

    Don't be afraid of the Northern Light. You don't need to fight it; you just need to balance it.

    • Step away from the cool, stark greys.
    • Lean into the warm "Greiges," the creamy off-whites, and the rich, earthy tones.
    • Test your colours on a board, not just a swatch.
    • Check your lightbulbs.

    Your home is your biggest investment, and paint is the most affordable way to transform how it feels. A fresh coat of the right colour can make a dark February evening feel cozy and safe, rather than gloomy and cold.

    Ready to find your perfect shade? Stop guessing and start testing. Visit your local Cloverdale Paint store this week. Bring in photos of your room, tell us which way your windows face, and let our experts help you find the colour that turns your Northern home into a warm retreat.

    Find Your Nearest Cloverdale Paint Store 


      Historical Note

      In 1933, when Cloverdale Paint was founded, farmhouses in the Fraser Valley needed paint that could survive rain, mud, and sun. Today, while our homes have changed, the environment hasn't. We are still making paint for that same environment. That’s the Cloverdale Paint promise.


    • 2026 Trends - The Calming Allure of Mineral-Inspired Colours

      by Jerwin Bautista | Dec 03, 2025
      In the rapidly evolving world of home design, colour trends continue to shift toward authenticity, comfort, and a deeper connection with the natural world. After years of bright whites and sharp contrasts, a softer story is emerging — one shaped by mineral warmth, tactile simplicity, and timeless serenity.

      Mineral-inspired neutrals are quietly redefining what it means to live beautifully. They remind us that design doesn’t need to shout to make an impact; instead, it can whisper calm intention. Colours like our CA064 Agate, CA023 Titanium, and CA028 Mist capture this philosophy with effortless grace.

      Where Natural Beauty Meets Everyday Living

      The inspiration behind this palette is rooted in the earth itself. Think layers of limestone, or the soft, earthy elegance of travertine with subtle tonal variations, and the quiet strength of stone and clay. These natural references bring a sense of permanence and grounding that feels especially relevant today.

      Mineral hues bridge the gap between traditional and contemporary design. They’re elegant yet approachable, sophisticated yet livable.  They are an ideal match for the rhythm of everyday life.

      When used in residential spaces, these tones shape interiors that feel restorative, comfortable, and connected to their surroundings. They reflect a growing desire for homes that support well-being and calm, with places to unwind, recharge, and reconnect.

      The Science of Calm: Colour and Well-Being

      It’s not just aesthetics driving this shift toward natural, mineral-based palettes; it’s biology. Studies continue to show that colours derived from nature reduce stress, improve mood, and promote emotional stability. This is a key principle of Biophilic Design, which seeks to recreate the sense of harmony we feel in natural environments.

      In this context, mineral and earth tones act as low-arousal, restorative backgrounds, helping the mind and body relax. Their soft light-absorbing properties gently diffuse daylight, reducing glare and visual tension. Instead of demanding attention, these colours make space for quiet moments, for natural materials, and for the people who live there.

      When paired with natural textures like linen, wool, clay, or rattan, mineral neutrals elevate the sensory experience of a space. Together, they form an environment that is both visually and emotionally balanced — proof that comfort and design can coexist beautifully.

      A Foundation for Timeless Design

      The beauty of mineral-inspired neutrals lies in their adaptability. Shades like Titanium CA023, with its refined balance between warm and cool, serve as the perfect foundation for layered interiors. Agate (CA064) adds a touch of mineral depth, evoking the subtle strength of stone, while Mist (CA028) offers a weightless softness ideal for open, airy spaces.

      These hues act as quiet anchors for more expressive design choices. They temper and balance bolder, saturated colours, making them feel more grounded and livable. Pairing them with rich terracottas, forest greens, or deep blues (think our 0634 Day Spa Colour of the Year) creates a sophisticated tension — one that feels curated and natural, never over-designed.

      Because they harmonize so effortlessly with both warm and cool tones, mineral neutrals transition beautifully across styles — from modern minimalism and Japandi-inspired simplicity to relaxed coastal or traditional heritage interiors. They’re timeless, not trend-bound, and their subtle complexity means they continue to reveal new character as light shifts throughout the day.

      Designing Interiors with Texture and Light

      Colour and texture go hand in hand, and mineral neutrals thrive in spaces that celebrate both. Their naturally soft undertones make them ideal companions for materials that have story and depth, such as limewashed walls, matte ceramics, unpolished stone, or bleached oak.

      Because these shades absorb light rather than reflect it sharply, they help create a cocooning atmosphere — warm in the morning, tranquil at dusk. In open-plan homes, this gentle modulation of light enhances flow and unity between rooms.

      For a layered look, try painting walls in Mist CA028 for a luminous base, trim in Titanium CA023 for subtle definition, and cabinetry or feature walls in Agate CA064 for depth and grounded contrast. The result is a home that feels cohesive, intentional, and quietly luxurious.

      The Emotional Layer of Design

      As our lives grow increasingly digital, there’s comfort in colours that feel tactile and timeless. These hues invite touch, warmth, and presence. They encourage us to notice the small details: the texture of linen curtains swaying in the breeze, the subtle play of light on a plaster wall, the grain of natural wood beneath us.

      This connection between colour and emotional well-being is no longer a design afterthought; it’s becoming the foundation of modern interiors. By drawing on nature’s palette, we create homes that restore rather than stimulate, calm rather than clutter.

      Living Beautifully, Naturally

      The location and experience of how mineral-inspired design can transform your space into a sanctuary of calm, connection, and timeless beauty. Whether you’re refreshing a single room or reimagining your entire home, mineral-inspired neutrals offer the ideal starting point. They provide the flexibility to evolve with your taste, complementing both minimal and maximal approaches, while maintaining a sense of harmony that endures.


      Explore these shades at your local Cloverdale Paint and ask one of our Customer Service Representatives which products and colours are perfect for your next project.
    • Day Spa - The Colour of Comfort

      by Jerwin Bautista | Nov 17, 2025
      Some colours work quietly in the background, supporting the mood of a space without drawing too much attention to themselves. Others make a statement the moment you walk into the room. Day Spa manages to do both. It is a deep, muted mineral blue that carries a sense of calm confidence, the kind of colour that instantly creates atmosphere. Rich enough to feel intentional, yet soft enough to be approached with ease, Day Spa offers the serenity of still water and the grounded presence of natural stone.

      At first glance, blue is often thought of as cool or coastal, a colour closely tied to breezy summer interiors or crisp nautical palettes. But Day Spa doesn’t perform that way. Its depth is softened by gray undertones, giving it a mineral quality — less ocean wave, more worn slate. Rather than feeling bright or playful, it feels settled, like a tone that has already lived a full life. This is the essence of what makes Day Spa so adaptable: it feels familiar from the moment it’s introduced.

      2026 colour of the Year


      How Day Spa Interacts with Light
      One of the most compelling aspects of Day Spa is the way it responds to changing daylight. In bright morning light, the colour reads soft and almost powdery, like a washed mineral pigment on plaster. As the day moves on and the light warms, the depth in the blue grows more pronounced, offering a cozy, enveloping effect. In the evening, especially under warm lamplight or candlelight, it becomes more intimate with a slightly aqua ambience from the warmth of the light— a soothing backdrop that feels restful and lived-in.

      This is what allows Day Spa to function as both a neutral and a statement colour. It doesn’t fight the eye. It doesn’t overwhelm the room. It simply supports whatever mood you want to cultivate, whether quiet retreat or collected sophistication.

      2026 colour of the Year


      Pairing Day Spa 0634 with Materials and Textures

      Day Spa pairs best with materials that share its sense of softness. Instead of glossy finishes or polished surfaces, think in terms of texture and natural variation:

      Material / Finish

      The key to styling Day Spa is to think in layers rather than contrast. Instead of pairing it with crisp whites or high-polish finishes, aim for tonal variation and softness — spaces that feel collected rather than curated.

      Where Day Spa Belongs in the Home


      Because of its depth and versatility, Day Spa can be used in a range of applications depending on the effect you want:

      • Bedrooms: Day Spa creates an immediate retreat-like atmosphere, especially when paired with layered bedding, soft lighting, and warm wood bedside tables. It encourages rest, exhale, and slow evenings.
      • Living Rooms: On full walls or as millwork, Day Spa introduces depth without heaviness. It works especially well in spaces that feature textured rugs, throw blankets, and low, natural light.
      • Bathrooms and Ensuites: True to its name, Day Spa is entirely at home in rooms meant for care and ritual. Pair with stone, matte tile, or brushed metal fixtures for a timeless spa-inspired atmosphere.  Consider a colour drench!
      • Entryways and Hallways: As a transitional colour, Day Spa creates a grounding first impression — a tone that signals warmth, stability, and invitation.

      2026 colour of the Year


      For cabinetry or built-ins, Day Spa reads architectural, offering presence without demanding attention. It’s a beautiful option for kitchen islands, vanity units, media cabinets, and mudroom storage.

      The Emotional Tone of Day Spa

      Day Spa is less about making a dramatic statement and more about cultivating a feeling. It evokes:

      • Quiet confidence

      • Slow, intentional living

      • Spaces that breathe

      • Comfort that doesn’t need to announce itself

      2026 colour of the Year

      It’s the colour of a warm mug in your hands. A late afternoon sunbeam across the floor. The soft hum of home.


      Day Spa doesn’t try to transform a room — it encourages the room to settle into itself.


      Are you ready to transform your home into a relaxing haven? Visit your nearest Cloverdale Paint store today and ask us how to include Day Spa 0634 for your next paint project.

    • Mid-Century Modern Colour Play: Bold Hues for a Stylish, DIY-friendly Space

      by Jerwin Bautista | Sep 16, 2025

      If you’ve been dreaming of a home that feels effortlessly stylish yet totally liveable, mid-century modern might just be your new best friend. Known for its clean lines, clever functionality, and that iconic mix of natural and man-made materials, this design style has stood the test of time—and for good reason. It’s chic without being fussy, retro without feeling dated, and versatile enough to play nice with other styles you already love.

      At its heart, mid-century modern design is about simplicity with soul. You’ll find furniture with sleek, tapered legs, warm wood tones like teak and walnut, and minimal ornamentation that still manages to feel special. There’s a certain elegance in how everything seems to have a purpose—form meets function in the best possible way. But what really makes this look pop? Colour.

      While the base of mid-century modern interiors is often neutral—think white walls, warm woods, and soft greys—it is bold colour accents that really bring it to life. From citrusy oranges to mustard yellows, teal blues to avocado greens, this style embraces colour like a long-lost friend. And when you add a rich, saturated tone, you elevate the entire space into something truly unforgettable.

      Why DIYers Love Mid-century Modern

      Midcentury Modern Living Room

      If you're a hands-on homeowner who enjoys rolling up your sleeves and personalizing your space, mid-century modern is a dream to work with. The clean lines make furniture flipping and refinishing totally doable—even for beginners. Thrift shops, vintage markets, and even curbside finds often turn up hidden gems just begging for a fresh coat of stain or a new fabric cover.

      Mid-century modern also lends itself well to mixing and matching. You don’t have to commit to a full-on Mad Men set. You can sprinkle in a few key pieces—a vintage armchair, a bold credenza, a funky light fixture—and blend them with modern comforts and personal touches. It’s all about balance, and this style gives you the freedom to find yours.

      The Power of Colour: Meet Deep Green-Blue

      Let’s zero in on one standout hue that’s perfect for your mid-century-inspired space: deep green-blue. Think of it as the love child of forest green and teal. It has that calming, nature-inspired vibe but with a touch of jewel-toned drama that makes it feel rich and sophisticated.

      This colour is incredibly versatile, which makes it a smart choice for DIY decorators. It brings depth and moodiness without making a room feel dark or cramped. Use it on walls for a cocooning effect, or introduce it more subtly through painted cabinetry, upholstery, or even accessories like pillows and lampshades.

      In a sun-filled space, deep green-blue can almost shimmer, adding dimension and interest. In rooms with less natural light, it adds a cozy, comforting feel that makes you want to curl up with a book and a blanket. It’s a colour that shifts with the light, making your space feel dynamic and alive.

      Blue Period 0690 Mid-century Modern

      Styling Tips: How to Use Deep Green-Blue Like a Pro

      Ready to dive in? Here are a few ideas to help you make the most of this bold, beautiful hue in your mid-century modern space:

      • Feature Wall Magic: Paint one wall in your living room or bedroom this deep green-blue and let it anchor the space. Balance it out with neutral tones and natural textures—like wood, rattan, or leather—for a grounded yet striking look.
      • Kitchen Glow-Up: Tired of plain white cabinets? Try painting your lower cabinets or an island in this rich tone. Pair with brass or gold hardware and white countertops for a high-end feel that still feels warm and welcoming.
      • Mix with Metallics: Gold, brass, and even copper look stunning against deep green-blue. Use these metals in light fixtures, curtain rods, and table accents to enhance the jewel-like effect of the colour.
      • Add Contrast with Warm Colours: Rust, mustard, and terracotta play beautifully with green-blue shades. Add a few throw pillows or a vintage rug in these tones to create a palette that feels layered and intentional.
      • Soften with Neutrals: Creamy whites, taupes, and greys will mellow out the boldness of this hue without dulling its impact. It's all about balance, and these softer shades help the green-blue shine.

      Design Crossovers: Mid-century Meets Modern Living

      One of the best things about mid-century modern is how well it adapts to other styles. Here’s how deep green-blue can work across different design approaches:

      • Scandinavian: Clean lines and neutral tones? Check. Add in green-blue for a splash of colour that still feels serene.
      • Bohemian/Boho: Layer it up! This hue looks fantastic with macramé wall hangings, patterned textiles, and houseplants galore.
      • Industrial: In spaces with concrete floors, brick walls, or steel elements, deep green-blue brings a much-needed softness and warmth.
      • Minimalist: Keep the décor simple but let the colour make a statement. A deep green-blue wall paired with sleek, streamlined furniture is the perfect modern combo.

      Midcentury Modern Kitchen

      The Final Brushstroke

      Mid-century modern design is about more than just aesthetics—it’s about creating a space that feels good to live in. It blends practicality with personality, and when you throw in a bold colour like deep green-blue, the results can be truly spectacular. Whether you're repainting a room, upcycling furniture, or just looking for inspiration, this timeless style and versatile hue give you endless ways to express your creativity.

      So go ahead—grab that paintbrush, pick a piece to refinish, and let your inner design nerd have some fun. Your mid-century modern dream space is just a few bold colour choices away.

    • From Brushstrokes to Burgers: A Family-Friendly Guide to Painting Your Home As a Family

      by Jerwin Bautista | Jul 24, 2025
      Painting your home doesn’t have to be a chore—it can be a chance to bond, laugh, and make memories. Whether you’re freshening up a rec room or reviving a weather-worn fence, painting as a family brings colour and joy to your space. With the right planning (and a little patience), even the youngest members of the household can get involved in safe and meaningful ways. Here's how to make it a fun and successful family paint day—from prep to the celebratory BBQ!

      Fun Areas to Paint Together: A backyard fence or a garage wall—it’s big, bold, and hard to mess up!  A rec room would be a great space to freshen up - just make sure to take out all the small stuff and cover furniture with drop cloths.

      Let the Kids In: Age-Appropriate Painting Tasks


      Toddlers to Age 6: The "Helpers in Training"


      Young kids love to feel included. While they shouldn’t handle paint-laden brushes unsupervised, they can still participate safely:

      • Colour consultants: Let them help pick the paint colour from swatches. You’d be surprised how quickly they’ll develop an opinion! Teach them the basics of the three primary colours: how yellow and blue make green, etc.
      • Sticker duty: Kids can place painter’s tape (with guidance) on all the areas that need to be painted. They are the mini forepersons for the project.
      • Clean-up crew: Give them a damp cloth or a dry bristle brush to and let them “dust” the baseboards after sanding.
      • Drop cloth duty: Kids love helping spread out the protective cloths, and they can tape down the corners —just remind them it’s not a skating rink!


      Ages 7–12: The “Junior DIYers”


      This age group can handle a bit more responsibility with supervision:

      • Edge taping: With a steady hand and some guidance, older kids can tape around trim, windows, and baseboards.
      • Undercoat pros: Allow them to apply primer or the first coat. Teach them how to load a roller in the tray and application techniques like using long, even strokes with consistent pressure and slightly overlapping each pass.

      Teens & Older Siblings: The “Project Leads”

      Teenagers often have the strength and patience to take on more detailed or higher-up work:

      • Cutting-in: Older siblings can tackle “cutting-in”—painting straight lines along edges and trim.
      • Rolling large walls: With a steady rhythm, teens can roll paint over larger surface areas like hallways or exteriors.
      • Touch-ups: They’re also great at spotting and fixing uneven coverage or drips.
      • Outdoor prep: Sanding flaking trim, washing siding, or scraping old paint are tasks older kids can handle responsibly.

      Prep Like a Pro: Key Areas to Paint and How to Get Your Kids Ready!

      Front Porch or Entryway

      - Prep: Sweep thoroughly, scrub railings, and sand any peeling spots.

      - Paint Tip: Use an exterior-grade paint or stain, and start early in the day to allow for proper drying. Avoid painting in direct sun.

      Bedroom Accent Wall

      - Prep: Wipe down walls, fill in nail holes, and tape off trim.

      - Paint Tip: Choose a washable finish for durability (eggshell or satin is ideal for kids’ rooms).

      Backyard Fence or Shed

      - Prep: Remove cobwebs, scrape off old paint, hose down the surface, and let it dry completely.

      - Paint Tip: A solid stain will bring old faded wood back to life and make it look sharp.


      Celebrate with a Collaborative Family BBQ


      After a job well done, it’s time to kick back and admire your handiwork with some burgers, drinks, and outdoor fun. Make the BBQ a continuation of the teamwork:

      Kid-Friendly Roles:
      - Fruit kabob station: Kids can thread berries and melon chunks onto wooden skewers.
      - Table artists: Let them decorate paper placemats or make a welcome sign for the patio table.

      Teen Takes:
      - Grill assistant: Older siblings can flip burgers or keep an eye on hotdogs with adult supervision.
      - Music coordinator: Have them make a painting day playlist for future renos!

      Family Add-Ons:
      - DIY photo booth with your freshly painted wall as a backdrop.
      - A Polaroid or phone shot of the whole crew—paint-splattered and proud!

      Painting Your Home With Your Family

      Painting with your family isn’t just about the results—it’s about the process. It’s a chance to slow down, get a little messy, and teach kids the value of hard work and creativity. With the right roles and a post-project celebration to look forward to, it just might become a new family tradition.

      After all, there’s nothing more satisfying than saying: “We did that—together.”

      Need help picking the perfect family-friendly paint or tools for safe DIY? Visit your local Cloverdale Paint store for advice, samples, and gear that makes it easier (and more fun) for everyone.

    • Choosing the Right Paint Colours for a New Home: Holly Grace’s Journey After the Fire

      by Jerwin Bautista | Jul 14, 2025

      If you’ve ever stood in front of a wall of paint chips, squinting and second-guessing your every decision, you’re not alone. Choosing paint colours can feel overwhelming at the best of times—but imagine choosing them for an entire home, before a single piece of furniture is in place, before the lighting is installed, and before you even have flooring. That’s exactly the challenge DIY influencer Holly Grace faced when she returned to her home after a devastating fire.


      Her house had been completely gutted — restored right back to fresh drywall and unfinished floors. While that clean slate might sound like a dream to some, to Holly, it was a daunting puzzle. “You’re not just picking colours,” she shared on Instagram. “You’re trying to imagine a full life in a space that hasn’t come back together yet.” And she’s right—paint isn’t just about aesthetics. It sets the mood, frames the design, and helps your home feel like home.


      Prepping Drywall: Where the Real Work Begins

      Before you can even think about test swatching colours or picking the perfect greige, you’ve got to deal with the not-so-glamorous prep work—priming. Fresh drywall is extremely porous, and it’ll soak up paint unevenly if not properly primed. Cloverdale Paint offers drywall primers specifically designed to seal the surface and provide a smooth, consistent base coat.


      But here’s the kicker: if you think painting walls is a big job, wait until you tackle the ceilings. Holly documented the process of painting hers, arms aching, neck sore, and a face full of paint! It’s a true labour of love. And when your entire home is primed and painted from scratch? That’s a serious commitment.


      Why Holly Chose Cloverdale Paint

      In the sea of paint brands, Holly Grace chose us! Cloverdale Paint is a 100% Canadian-owned and operated company with a proud history of supplying quality paint for Canadian professional applicators and homeowners. For Holly—and for many DIYers across Canada—it’s not just about the product, it’s about the people behind it.


      The staff at our stores are known for their warmth, expertise, and patience (which, let’s be honest, is key when you’re panicking over the perfect not-too-yellow creamy colour). Holly called her local Cloverdale team “absolutely lovely,” noting how they answered every question and offered helpful advice. That kind of support is invaluable when you’re rebuilding a home from the ground up.


      The Truth About Paint Colour: It’s Not What You Think

      Now here’s where it gets real: paint colours never look the same on your wall as they do on the chip. Why? A few reasons:

      • Primed drywall is super white—blindingly so. It can throw off your perception of colour and make tones appear more saturated with colour or darker than they are. Pro Tip: Have the store tint your drywall primer (like half strength) with your intended finish coat colour.
      • Lighting matters. A north-facing room gets very different natural light from a south-facing one. Add in the warmth or coolness of your light bulbs, and suddenly your “perfect taupe” looks mauve.
      • Paint changes as it dries, and it almost always looks darker on a full wall than in the can or on a tiny swatch.


      That’s why Cloverdale Paint’s tester cans are such a game-changer. Each tester contains enough paint to apply in more than one spot in your home—perfect for trying it in both your sunny kitchen and that shadowy hallway. Pro Tip: Two coats matter. The first coat gives you coverage, but the second is what reveals the true hue and depth of the colour.


      Holly emphasized how critical it was to sample each colour in a few different areas before making her final call. “The same shade looked so much different on the wall than in the can. And it looked different again once it was dry. The bright white of the drywall skewed my perception of the colour, so I painted an entire section to get a better understanding of how the colour was going to look.” She painted large sample areas across her home—on different walls, in different lighting, at different times of day.


      Following Holly Grace’s journey reminds us that colour choice isn’t just a decision—it’s a process. Especially when you’re starting from nothing, it’s not about finding the “right” paint colour in an instant. It’s about exploration, trial and error, and trusting your instincts along the way.


      At Cloverdale Paint, DIYers like Holly have the tools, advice, and locally made products they need to bring their vision to life—even when that vision starts with four bare walls and a ceiling that needs two coats of primer.


      So if you’re facing a colour conundrum of your own, don’t stress. Take a page out of Holly’s book: prime first, test generously, and don’t rush the process. Paint is powerful, but it takes time to get it right, and your home deserves that.


      Thinking about your next paint project? Visit your nearest Cloverdale Paint store and speak with any of our Customer Service Representatives to get the best colour advice for your home. 

    • Your Front Door, Your Statement: A Fresh Take on Exterior Paint Makeovers

      by Jerwin Bautista | Jun 26, 2025

      Your front door is more than an entryway—it’s your home’s handshake, its first impression, and in many ways, a reflection of you. Whether you lean bold and dramatic or subtle and serene, a front door paint makeover is one of the quickest, most impactful ways to refresh your home’s curb appeal. Best of all, it’s a project you can knock off in a weekend. But before you crack open that can of paint, there are a few details worth knowing—from prep and taping to colour selection and finish decisions.

      Prepping Your Front Door for Success

      Great results start with great preparation. Begin by giving your door a thorough clean to remove dust, dirt, and any oily residue. If your door has seen a few seasons, sanding is your friend—lightly sand to remove flaking paint or rough spots, especially around edges and corners. Wipe again with a soft cloth to remove residue. If you notice rust or mildew, treat those areas first.

      Once the surface is smooth and clean, you’re ready to tape off. Use painter’s tape to protect hinges, weather stripping, the threshold, and any areas where the door meets glass or decorative moulding. Don’t forget to remove or tape off the hardware unless you plan to swap it out for a fresh new handle or knocker.  Taking off the hardware first is your best bet for professional results.

      To Paint Both Sides of Your Front Door…or Not?

      One of the most common questions we hear is: Should I paint both sides of my front door the same colour?

      Short answer: not necessarily. If the inside of your door opens into a neutral hallway or has a different décor palette than your exterior, feel free to treat the inside as its own project. Many homeowners choose to keep the interior side white or a softer, complementary shade that matches the trim inside. It’s completely acceptable—and often practical—to only paint the exterior side of the door if you're focused on curb appeal.

        0788 Green Glow

      Colour: 0788 Green Glow


      Here’s a trick that’s often overlooked: Which colour should go on the edges of the door?

      Generally, the rule of thumb is this—paint the edge of the door the same colour as the side it opens towards. So, if your door opens inward (as most do), the edge that’s visible when it’s ajar from the inside should match the interior colour. The same goes if your door opens outward—match the exterior colour on the exposed edge.

      It’s a subtle touch, but it helps create a seamless, polished look, especially when the door swings open.

      Do I Paint the Frame and Glass Lite Trim?

      0823 Sun Drops

      Colour: 0823 Sun Drops

      When it comes to glass lite frames (those decorative or functional window panels built into the doorway), you have a choice. Most homeowners stick to painting just the main body of the door and leave the glass lite frames the same colour as the factory finish, especially if they’re vinyl. That said, if the frame is wood or metal and you're feeling confident, go ahead and paint it to match or complement the door colour—it can help unify the look.

      As for the door frame (the surrounding trim or casing), that’s up to you. Some prefer to paint the frame the same colour as the door for a bold, unified entrance. Others keep the frame white or neutral to match exterior trim. Just make sure whatever choice you make feels intentional and cohesive with the rest of your home’s façade.

      Let Colour Be Your Calling Card - Choosing Colours for Your Front Door

      EX040 Estate

      Colour: EX040 Estate

      Now, onto the fun part: choosing your colour. Gone are the days when your only options were burgundy, navy, or forest green. While those are still timeless choices, today’s front doors can be any colour under the sun.

      Thinking of a sunflower yellow to brighten a grey bungalow? Go for it. Want a matte black door for a modern edge? Stunning. Dreaming of sage green, peacock blue, or a rich terracotta red? All welcome.

      Your front door should be your personality in a paint can. Bold, calm, artistic, playful—there’s no one “right” colour. Trends come and go, but the best colour is the one that makes you smile every time you come home. If you’re feeling uncertain, try taping up some paint chips or painting a few sample swatches. Check them at different times of day to see how the light changes things.

      Need a starting point? Here are a few ideas:

      Cheerful & Warm: Goldenrod, burnt orange, peachy coral

      Classic with a Twist: Deep navy, moody plum, charcoal

      Nature-Inspired: Sage green, driftwood taupe, misty blue

      Bold & Modern: Fire engine red, canary yellow, jet black


      Final Tips Before You Start Painting Your Front Door

      • Ensure your paint is formulated for exteriors—ideally, one that resists UV fading and weather wear. Our team at any of our stores can help select the product best suited for your project.
      • Choose a satin or semi-gloss finish for durability and easy cleaning.
      • Don’t paint in extreme heat or direct sun—it’ll cause uneven drying and lap marks.
      • Remove the door and lay it flat if possible—it’s easier, especially if you’re painting all sides.
      • Plan for drying time between coats and try not to close the door until it's fully cured (usually 24 hours).

      1166 Noble Honor

      Colour: 1166 Noble Honor

      A painted front door is like a firm handshake—confident, memorable, and uniquely you. So go ahead, take the plunge. Whether you’re calming the curb with soft neutrals or waking it up with a pop of colour, this small change packs a big punch. Happy painting!

      Make sure to visit your nearest Cloverdale Paint store today so you can get started on painting one of the easiest and most effective ways to upgrade the look of your home: your front door.

    • The Perfect Stain - WeatherOne® Stains

      by Jerwin Bautista | May 27, 2025

      Let’s be honest—few things are as satisfying as a fresh coat of stain on a fence, pergola, or set of patio chairs. That rich colour. That polished look. That feeling of “I did that.” If you’re getting ready to revive your backyard space or take on some serious siding TLC, Cloverdale Paint’s WeatherOne® Stains are about to be your new best friends.

      Cloverdale offers two standout options in the WeatherOne® line—Solid Hide (723 Series) and Semi-Transparent (066 Series)—and each serves a different purpose depending on the look you’re going for and the condition of your wood.

      Let’s break it down so you can pick the right stain with confidence.


      WeatherOne® Solid Hide: Maximum Coverage, Minimal Worry

      Think of the Solid Hide Stain as the heavy-duty workhorse in your painting toolkit. It's made for vertical wood siding, wood composites, shingles, trim, fascia, and outdoor furniture. If your wood has a few imperfections or an uneven tone—or if you’re just craving a rich, uniform colour—this is your go-to.

      This stain goes on like paint, completely covering the grain while still allowing the wood to breathe. Backed by a 15-year limited warranty, it’s designed with 100% acrylic resin for superior adhesion, excellent durability, and long-lasting colour protection.


      Bonus features:
      • It’s self-priming on most woods.
      • It includes a built-in mildewcide to prevent mildew, mould, and algae from settling in.
      • It’s low VOC, meaning it’s better for the environment and your nose.

      Pro tip: If you're working with new cedar, especially with a light topcoat, it’s smart to apply a stain-blocking primer first to avoid potential tannin bleed.


      WeatherOne® Semi-Transparent: Let the Wood Grain Shine

      Now, if you’re in love with the natural texture of your wood and want it to show through, the WeatherOne® Semi-Transparent Stain is the answer. This 066 Series stain enhances the wood’s natural beauty, soaking deep into the grain and providing a rich, tinted finish that feels organic and timeless.


      It’s perfect for fences, lattice, patios, outdoor furniture, siding, and even interior wood surfaces—basically any horizontal or vertical wood surface where you want that woodgrain to take centre stage.


      Why people love it:

      • It’s fast-drying (tack-free in just 15 minutes).
      • It’s abrasion-resistant, which means it stands up well to wear.
      • Like the solid hide, it contains mildewcide protection.
      • Also low VOC and GreenWise® certified—win-win.


      Fun fact: It comes as a clear tint base and must be tinted to achieve your desired colour. This opens the door to endless custom stain options—so you can go bold, go subtle, or go classic.


      Where to Use Each Stain (And Where Not To) 


      So, if you’re staining a new fence—go semi-transparent. If you’re refreshing weathered siding—solid hide is your best bet.


      How to Apply WeatherOne Stains Like a Pro (Even if You’re a Weekend Warrior)

      Both WeatherOne® stains are DIY-friendly and can be applied using a brush, roller, or sprayer. Here’s a quick step-by-step to help you get it right the first time:
      1. Prep your surface. Clean the wood thoroughly and let it dry. Remove any loose stain or paint from previous applications.
      2. Stir, don’t shake. Stir the stain well before and during use to ensure consistent colour.
      3. Apply evenly. Use smooth, even strokes. Don’t overwork it—one or two coats, depending on the opacity you want.
      4. Let it dry. Re-coat times vary: 6 hours for the Solid Hide and just 1 hour for the Semi-Transparent.

      5. Clean up easily. Just use warm, soapy water.


      Each gallon covers 250–400 sq. ft., depending on the product and surface texture. Be sure to read the label or ask a Cloverdale Paint expert in-store to calculate how much you’ll need.


      Why Cloverdale Paint?

      Aside from being 100% Canadian-owned and operated, Cloverdale Paint is trusted by DIYers and pros alike for its environmentally conscious, long-lasting coatings. With GreenWise® Certification, the WeatherOne® stains are designed to perform in our unique Canadian climate—rain, snow, sun and all.
      Plus, our team is incredibly approachable. Whether you’re an experienced painter or just tackling your first outdoor project, the staff at Cloverdale Paint will walk you through product choices, colour options, and application tips without overwhelming you.


      Final Brushstroke

      Whatever your project—reclaiming a weathered fence, transforming a tired shed, or simply refreshing a few planters—WeatherOne® Stains help you achieve beautiful, professional-looking results with DIY ease.


      Want the bold, rich look of paint but with the performance of a stain? Choose Solid Hide. Prefer to show off those knots and grains? Semi-Transparent is calling your name.   
    • 3 Creative Paint Upcycling Paint Ideas: Make the Most of Your Leftover Paint

      by Jerwin Bautista | Apr 22, 2025

      So you’ve just finished painting your room, and you’re admiring those fresh, flawless walls. But as you tidy up, you realize… you’ve got a fair bit of paint left over. Now what?

      First off, high five for taking on a painting project — it’s one of the most impactful (and affordable) ways to transform your space! If you used a paint calculator, chances are you got pretty close to the right amount. But even with the best estimates, a little leftover paint is common — and instead of letting it sit forgotten in the basement, you can give it new life through creative upcycling.

      Start Smart: Calculating Paint to Prevent Extra

      Before we dive into the fun stuff, here’s a quick tip for next time: Calculating paint is your best friend when it comes to figuring out how much paint you actually need, helping you avoid overspending and overbuying.

      How to Calculate How Much Paint is Needed

      The average bedroom requires 1 gallon (3.70 litres) of wall paint. A one-gallon (3.70 litre) can of wall paint covers about 375 – 400 square feet (35 to 37 square meters). Calculate one room at a time and determine if you need 1 or 2 coats.

      • One (1) coat of premium paint will cover most surfaces when you are painting over a similar colour.

      • Two (2) coats may be required for major colour changes, painting over damaged or old surfaces or if you desire greater durability and coverage.


      Here's a simple formula to determine how much paint you need based on the surfaces you're painting:

      Total surface area/coverage per can = amount required


      EXAMPLE:

      Let's say the dimensions of the room you're painting are 12’ x 14’ with 8’ ceilings (3.65m x 4.26m x 2.4m). Calculate the total surface area of the walls by multiplying the width by the height for each wall and adding them together.

      2 x (12 x 8) + 2 x (14 x 8) = 416 sq ft.

      or

      2 x (3.65 x 2.4) + 2 x (4.26 x 2.4) = 38.6 sq metre

      So, how do you calculate what you need?

      The total surface area from above / coverage per can* = the amount required to buy

      Example: 416 sq ft. / 375 sq ft. = 1.1 gallon (3.70 litre) cans

      *The average coverage per one can of paint is usually 375 sq. ft/can. 


      But let’s say you do have some extra paint. No worries — that just means more chances to get creative.

      Turn Leftovers Into a Feature Wall

      Got a pale or mid-tone colour left over? One simple but stunning trick is to buy a Colour Tester of a darker version of that same hue. Gradually mix the tester with your leftover paint and voilà — you’ve got a coordinated feature wall that adds depth and drama to your space. This works beautifully in bedrooms, living areas, or behind shelving units where you want a subtle contrast that still ties in with the room’s overall vibe. 


      Above photo:  0579 Turkish Tower with 0585 Oyster Catch


      Above photo:  0138 Coconut Macaroon with 0142 Ranch House


      Try Paint Pouring for Instant Art

      If you’ve ever watched a paint pouring video, you know how mesmerizing it can be — and the good news is, it’s not just for acrylic artists. You can use leftover latex interior wall paint to create gorgeous, abstract art for your walls. 


      Use the pour technique onto canvas, wood panels, or even old cabinet doors you’ve repurposed. Layer two or three coordinating colours, let gravity do its thing, and you’ve achieved custom art that perfectly matches your space. Seal it with a clear topcoat, and hang it with pride.


      Revive Thrift Finds & Home Accents

      Leftover paint is a DIYer’s dream. A small amount can go a long way when it comes to freshening up thrifted treasures and forgotten household items:

      • Plant pots – Give terracotta pots or cement containers a stylish matte makeover.
      • Stools and side tables – Add colour-blocking or paint just the legs for a dipped look.
      • Picture frames – Make a gallery wall pop with painted frames in tones that complement your interior.
      • Drawer interiors or cabinet backs – Add a pop of colour where guests least expect it.


      Leftover Paint can be Eco-Friendly and Budget-Friendly

      Using up your leftover paint isn’t just fun — it’s also sustainable. You’re keeping paint out of the landfill, reducing waste, and avoiding the need to buy more products down the line.

      And let’s be honest: it feels pretty great to say, “Oh, that? I made it myself.”


      Final Tip: Storing Leftover Paint Right

      If you still have paint leftover after your mini-makeovers, store it properly for future touch-ups:

      • Transfer to a small, airtight container (like a mason jar).
      • Label the jar with the colour name & code, paint finish, and the room the paint was used in.
      • Keep it in a cool, dry place away from direct sunlight or freezing temperatures.


      How to Recycle Your Leftover Paint

      If you're not planning any projects with your leftover paint, recycling it is a responsible and environmentally friendly choice. In Canada, Product Care Recycling offers a comprehensive program to ensure unused paint is managed safely and sustainably. Product Care Recycling

      Product Care Recycling provides over 200 drop-off locations across British Columbia where you can dispose of your leftover paint free of charge. To ensure a smooth recycling process:

      • Original Containers: Paint must be in its original container with the label intact and securely sealed.
      • No Mixing: Do not combine different types of paint products. Mixed paints cannot be accepted.
      • Quantity Limits: You can bring up to 10 containers of paint or 50 spray cans at a time, with each container no larger than 25 litres and each aerosol can no larger than 680g (24oz).

      To find your nearest drop-off location, use Product Care's Recycling Locator.

      What Happens to Recycled Paint?

      Once collected, the paint undergoes a meticulous recycling process:

      1. Collection and Transportation: Paint is transported to authorized processing facilities.
      2. Sorting and Inspection: At the facility, paint is sorted by type (latex, oil-based, aerosol) and inspected for contamination.
      3. Processing: High-quality paint is filtered and reprocessed into new paint products. Lower-quality paint may be used in applications like cement manufacturing, ensuring minimal waste.


      By recycling paint, valuable resources are conserved, and environmental pollution is reduced.


      PaintShare Program: Give Paint a Second Life

      If your leftover paint is still in good condition, consider donating it through Product Care's PaintShare program. This initiative allows individuals to drop off unused paint, which is then made available for free to others who can use it. It's an excellent way to promote reuse and support community projects.


      Benefits of Recycling Paint

      Proper paint disposal offers several advantages:

      • Environmental Protection: Prevents harmful chemicals from contaminating soil and waterways.
      • Resource Conservation: Allows materials to be reused or repurposed, reducing the need for new raw materials.
      • Community Support: Programs like PaintShare provide affordable resources for community initiatives and individuals.


      By choosing to recycle your leftover paint, you contribute to a healthier environment and a more sustainable community. When you visit your closest Cloverdale Paint store, our staff can help you provide a better estimate on how much paint you need based on other factors like surface type, colour choice, budget, and more. 

    • How Lighting Affects Paint Colour: What You Need to Know!

      by Jerwin Bautista | Apr 15, 2025

      Choosing the perfect paint colour is only half the battle—lighting plays a crucial role in how that colour actually appears in your home. Even professional interior designers rely on specialized lighting experts to get it right. Why? Because without light, colour simply cannot exist!

      The Evolution of Lightbulbs: Incandescent to LED

      For years, incandescent bulbs were the go-to lighting source. These bulbs produce light by heating a filament until it glows—a process known as incandescence. The problem? They were highly inefficient, with only about 10% of the energy used converted into visible light while the rest was wasted as heat. If you ever burned your fingers replacing a bulb, you’re not alone!

      Then came LEDs (Light Emitting Diodes), which first hit the market in the early 2000s. Initially, they were expensive and emitted an unappealing blue hue. However, technology advanced quickly, and now LEDs are a lighting standard. They save energy, last longer, and offer a wide range of colour temperatures to suit different spaces.

      Understanding LED Colour Temperature

      Light Temperatures

      Unlike incandescent bulbs, which have a consistent warm glow, LED lighting comes in various colour temperatures measured in Kelvins (K). Here’s a quick breakdown:

      • 2700K–3000K: Warm white, similar to incandescent bulbs
      • 4000K: Cool white, commonly found in offices and classrooms
      • 5000K+: Daylight, offering a bright and crisp feel

      Consistency is key! One of the biggest mistakes homeowners make is mixing colour temperatures within the same space. This inconsistency alters the way paint colours appear and can create a visually disjointed look. For example, if your living room has warm lighting but your kitchen has cool lighting, a creamy off-white wall colour may appear yellow in one room and greenish in another. To avoid this, aim for uniform lighting throughout your space.

      LED Light Types

      The Role of Natural Light

      Artificial lighting isn’t the only factor affecting colour perception—natural light is just as important. Depending on the time of day and the direction your windows face, paint colours can look dramatically different. The next few sections will talk about how light affects your home depending on where natural light shines.

      Morning Light (East-Facing Windows)

      Effects of Morning Light from East-Facing Windows

      East Facing Windows

      Warm, Golden Light in the Morning

      • East-facing rooms get direct sunlight in the early part of the day. This light tends to be soft, golden, and warm.
      • During this time, paint colours appear warmer and more vibrant.
      • Whites and pastels can glow beautifully, while yellows and creams feel especially cheerful and sunny.

      Cool, Indirect Light in the Afternoon

      • As the sun moves west, east-facing rooms fall into shade.
      • In the afternoon, the light becomes more indirect and cool, which can make some paint colours look muted or even a bit dull.
      • Cooler tones (especially greys or blues) may appear starker or more subdued later in the day.

      Colour Undertones that Work Well in East-Facing Rooms

      To keep your room feeling balanced throughout the day, consider colours with these undertones:

      Warm Undertones

      • Soft Yellows (e.g. Butter CA128, Creme Brulee CA116 ). These amplify the morning sun and stay cozy even as the light fades.
      • Warm Neutrals (e.g. Bone CA103, Scone CA109). These adapt well to changing light conditions and won’t feel cold in the afternoon.
      • Muted Terracottas or Peach Tones: (e.g. Tea Cookie 1002, Tallow 0987). These can reflect the golden light nicely and still feel grounded when the room cools off later.

      Gentle Pink or Apricot Undertones

      • These soft hues can enhance the warmth of the morning light and avoid turning drab later in the day. (e.g. White Meadow 1055, Baby Blossom 1076)

      Use with Caution: Cool Blues and Steely Greys

      These can feel refreshing in the morning but risk becoming chilly or flat afternoon. If you love these tones, look for versions with a hint of warmth (e.g.Venetian Wall 0544).

      Midday Light (South-Facing Windows): Bright and pure light

      Effects of Midday Light in South-Facing Rooms

      South Facing Windows

      Bright, Pure, and Neutral Light

      • Midday southern light is strong, white, and relatively balanced across the spectrum.
      • Because it’s so bright and neutral, it tends to reveal colours in their truest form, without heavily skewing undertones.
      • This makes south-facing rooms incredibly versatile for a wide range of paint colours.

      Enhanced Warmth

      • Although midday southern light is balanced, it still carries a slight warm glow, especially in the afternoon.
      • This can intensify warmer hues (reds, oranges, yellows) and make them feel even more radiant or vibrant.

      Can Wash Out Pale Colours

      • The intensity of the light may wash out very soft pastels or pale neutrals, making them appear faded or chalky.

      Suitable Colour Undertones for South-Facing Rooms

      Cool Undertones

      • Blues, Blue-Greys, and Soft Greens: These colours provide a sense of calm and balance the warm light without becoming too stark or cold. (e.g. Cirrus CA188, Sage CA182)

      Neutral Undertones

      • Balanced Greys, Greige, and Taupe: The even lighting keeps neutrals true to tone, making them perfect for living rooms or multipurpose spaces. (e.g. Snowglory 0531, Putty CA073)

      Use with Caution: Pale Colours

      • Can look dull or washed out unless they have a grounding base or deeper accent.

      Evening Light (West-Facing Windows): Warm, golden hue

      Effects of Evening Light in West-Facing Rooms

      West Facing Windows

      Cool and Dim in the Morning

      • Early in the day, west-facing rooms receive very little direct sunlight.
      • Morning light here tends to be cool and somewhat shadowy, which can make colours look slightly dull or greyed out.

      Warm, Golden Light in the Evening

      • As the sun sets, west-facing windows flood rooms with a rich, golden-orange glow.
      • This dramatic light adds warmth and depth, especially to medium and dark paint colours.
      • White and pale hues may appear creamier or more yellow-toned under this light.

      Colour Shift Throughout the Day

      • Since light changes so much, west-facing rooms benefit from colours that can handle both cool and warm light.
      • Richer, grounded hues tend to feel more consistent and flattering.

      Suitable Colour Undertones for West-Facing Rooms

      Warm Undertones

      • Clay, Terracotta, and Rust: These colours glow under evening light, creating a cozy, enveloping feel. (e.g. Cobblestone CA076, Brandy CA226).
      • Honeyed Neutrals and Warm Taupes: These tones maintain warmth throughout the day and are especially flattering when lit by the golden hour sun. (e.g. Agate CA064, Beechwood CA100).

      Deep Earth Tones

      • Olive, Forest Green, and Rich Browns: These colours feel grounded in the cooler morning and take on a luxurious glow in the evening. (e.g. Bohemian Earth CA170, Sycamore EX255)

      Muted Mid-Tone Colours

      • Dusky Rose, Burnt Sienna, or Smoky Plum: These have enough depth to stay interesting during cooler hours and become radiant at sunset. (e.g. Sunstone CA223, Gypsy’s Gown 1311).

      Use with Caution: Pure Whites

      • Can shift dramatically - looking sterile in the morning and overly yellow in the evening.

      North-Facing Rooms: Consistently Cool, Indirect Light

      North Facing Windows

      Light Quality: Soft, Cool, and Diffused

      • Unlike east-facing rooms, which get a short burst of warm morning light, north-facing rooms almost never receive direct sunlight.

      How Paint Colours Are Affected

      • Colours appear muted, cooler, and less saturated than they do on the chip or in other exposures.
      • Whites can look flat or blueish, and soft pastels may seem washed out.
      • Bold or saturated hues may lose some vibrancy—but they also don't shift as dramatically with the light, offering a more predictable result.

      Spatial Feel

      • These rooms can feel moody, shadowy, or dim, especially in winter or in smaller spaces. But with the right palette, they become elegant, calming, and sophisticated

      Best Colour Undertones for North-Facing Rooms

      Warm, Light-Reflective Tones

      • Creamy Whites, Buttery Beiges, or Soft Honey (e.g. Artisan White CA013, White Sands CA009). These counteract the blue-grey light and help brighten the room naturally.
      • Warm Greige and Taupe (e.g. Wool CA031, Soapstone CA034). These neutrals maintain depth without feeling cold or chalky.

      Grounded, Cozy Mid-Tones

      • Terracotta, Warm Clay, or Dusty Rose (e.g. Coconut Macaroon 0138). Add a sense of intimacy and glow in the cooler northern light.
      • Ochre or Muted Gold (e.g. Ochre CA126). Bring richness and warmth without overwhelming the space

      Rich, Complex Colours

      • Olive Green, Deep Teal, or Burgundy (e.g. Wheatgrass CA174, Blue Period 0690, Creise CA221). These can hold their own and feel dramatic but grounded—especially effective in larger north-facing rooms

      Use with Caution: Icy Blues or Cool Greys

      • Could look much too sterile or shadowy, drab


      Why Do Paint Colours Look Different at Home?

      Natural Light in Living Rooms

      Ever picked a paint colour in the store only to find it looks completely different on your walls? That’s because paint stores have bright, controlled lighting, while your home has a mix of natural and artificial light. Wall texture also plays a role—paint chips are flat, smooth surfaces that reflect light differently than a textured wall.

      Pro Tip for Choosing Paint Colours

      Before committing to a paint colour, apply test patches in different areas of your home and observe them at different times of the day.

      Making an Informed Colour Choice

      Now that you understand how lighting affects paint colour, here are some questions to consider before selecting your shade:

      • What direction does the room face?
      • What kind of lighting is used in the space?
      • Have you recently upgraded to LED lighting?

      If you’re unsure, don’t hesitate to test your paint colours in different lighting conditions before making your final decision.

      The Science Behind Metamerism

      Ever noticed how a colour can look perfect in one room but completely different in another? This is known as metamerism —a phenomenon where colours appear to change under different lighting conditions. Understanding this effect can help you make more informed decisions when selecting paint.

      Final Thoughts about Light and Paint Colours

      Lighting and colour are inseparable. If you want to achieve a cohesive and harmonious look in your home, pay close attention to both natural and artificial lighting sources. When in doubt, test, test, test!

      For expert advice on colour selection, visit your nearest Cloverdale Paint store. We’re always here to help!


    • What is Colour Drenching? Is it Right for Your Space?

      by Jerwin Bautista | Feb 27, 2025

      Photo Credit - Paul Massey


      Colour Drenching vs. Monochromatic Colour Scheme: What’s the Difference?

      Both colour drenching and monochromatic schemes have attracted significant attention lately, but while they may appear similar in theory, they bring distinctly different vibes to a space. 

      Here’s an explanation of how each technique works and how to choose the right one for your interior design style goals. 


      Colour Drenching Dark Hues: Immersive & Bold

      What It Is: Dark colour drenching uses a single colour to cover every surface in a room—walls, ceiling, trim, millwork and doors. This creates an immersive look, making the room feel like it’s “wrapped” in one unified hue. In some cases, even furniture and other features of a room are painted with the same colour.

      Where It Works Best: This trend is fantastic for rooms where you want a cocooning, intimate feel, like bedrooms, reading nooks, or powder rooms. It’s especially impactful with colours like forest green, rich plum purples, or deep navy. 

      The Vibe: Bold, dramatic, and high-impact. Colour drenching transforms rooms into all-encompassing spaces where the chosen colour takes centre stage.

        Colour Drenching Trend

      Photo Credit - Jennifer Hughes


      Colour Drenching Light Hues: Modern Minimal Look

      What It Is: Light colour drenching can have beautiful benefits, bringing a fresh twist to this typically bold trend. Light colour drenching offers a clean, cohesive look without feeling overpowering. By blanketing walls, ceiling, doors, millwork and trim in the same soft hue, you create a seamless, minimalist design that’s understated yet sophisticated.

      Where It Works Best: Light colours reflect more natural and artificial light, making the space feel larger and airier. Colour drenching with soft whites, pastels, or gentle neutrals helps create an open, expansive feel, even in smaller rooms.

      The Vibe: Overall, light colour drenching is ideal for creating an inviting, peaceful space that feels modern, versatile, and easy to style around. Whether it’s creamy beige, soft lavender, or airy blue, using a light shade lets you enjoy the benefits of colour drenching with a softer, more spacious vibe.  

      Primary Bedroom portfolioPhoto Credit - Nadine Stay

      Where to Use Colour Drenching

      Colour drenching works well in spaces of all sizes but is especially impactful in smaller rooms where a sense of unity can make the space feel more spacious. Consider trying this technique in:

      • Bedrooms: Deep, relaxing tones create a peaceful retreat.
      • Living Rooms: Warm neutrals make the space feel cozy and inviting.
      • Bathrooms: Bold colours make small bathrooms feel luxurious and chic.


      If you’re ready to try something new, colour drenching is a trend that brings style, depth, and personality to any room. With the right paint colour, this technique can turn a simple space into a design statement, one that wraps you in colour from floor to ceiling. Dive into your favourite hue and let colour drenching transform your home into an immersive experience.


      How to Apply Colour Drenching in Your Home

      • Plan Your Surfaces: Decide which surfaces to paint. Walls, ceilings, trim, millwork and even doors can be included for a full effect. Keep in mind that this full effect of colour drenching occurs when everything receives the same colour of paint.
      • Use the Right Finish: For a unified look, choose the same finish for all surfaces (e.g., flat, eggshell or satin). To elevate the look, you can experiment with different finishes on details like trim.  For example, ceiling in flat, walls in eggshell and trim in satin.  The subtle nuance of the sheen change slightly alters the way we interpret the colour and that creates visual interest, especially with dark colours. The light hits each sheen differently, each surface looks different despite being the same hue.  
      • Balance with Decor: The right decor items enhance the feel of the space. Add decor pieces in contrasting or neutral tones. Soft furnishings, rugs, and artwork can break up the intensity while enhancing the space's overall feel.  Balance the look by choosing rugs with pattern that implies a similar colour to the main drench colour. Be sure to add textural items (textile art, pillows, baskets, throws etc.) to create depth.

      Monochromatic Colour Scheme: Layered & Harmonious

      What It Is: A monochromatic colour scheme involves using various shades, tints, or tones of the same colour family throughout a room. For example, a room in soft taupe could include light taupe walls, medium-taupe furniture, and deep mocha decor. This adds depth and dimension while keeping a cohesive look.

      Where It Works Best: Monochromatic schemes suit a variety of spaces, from living rooms to kitchens, as they’re versatile and provide a balanced, layered look without overwhelming the eye.

      The Vibe: Subtle, harmonious, and sophisticated. Monochromatic schemes add interest through tone and shade variation, creating a calm, well-coordinated aesthetic.

      Key Differences

      • Colour Drenching focuses on a single colour value for all surfaces, creating a unified look.
      • Monochromatic Schemes use a range of tones and shades within the same colour family, providing depth through gradual variations and tonal layering.

      How to Apply a Monochromatic Colour Scheme in your Home

      • Plan Your Surfaces: Choose a base colour for your walls. Since the walls will likely be your largest area, plan on a light colour to be your starting point. You can carry this colour onto your ceiling or choose an even lighter version of your wall colour for added ceiling dimension. For your trims and millwork, choose the same colour as your walls except two shades darker. If you only choose one shade darker, you run the risk of not being able to tell the difference between the two areas.  However, it all depends on how subtle you wish the vibe to be. 
      • Use the Right Finish: As with the colour drench aesthetic, consider changing the sheen level between walls and trim.  A flat sheen on the walls and a satin on the trims and millwork will continue to add subtle depth to the overall monochromatic vibe.
      • Balance with Decor: Carry a paint swatch sample of both your trim and wall colour to shop for textiles and accessories in various shades of the same colour, paying special attention to the undertones as you go along.  Remember that contrast creates visual interest and so does texture so think of soft furnishings, thick wool rugs and woven baskets in your accessorizing. 


      Colour Drench Blog


      Which One to Choose?  Drenched or Monochromatic?

      Both approaches have unique appeal and can be tailored to suit different design objectives. Whether aiming for a bold, immersive environment or a nuanced, layered aesthetic, understanding the distinctions between colour drenching and monochromatic schemes enables more informed and effective design choices.


    • Love is in the Air (and on your Walls!) 6 Colours for Hopeless Romantics

      by Jerwin Bautista | Feb 10, 2025

      Colours for Hopeless Romantics

      They say love makes the world go 'round, but have you ever considered how it could transform your home? Whether you're a passionate poet, a daydreaming romantic, or someone who simply loves a warm, inviting space, we have the perfect colours to sweep you off your feet! With hues like Romantic Ballad, A Lot of Love, Be Mine, True Romance, Impatient Heart, and Lover's Kiss, this is a love story written in paint.  


      Set the Mood with Romantic Ballad 1183

      Romantic Ballad 1183

      Some love stories take time, while others are instant sparks. Romantic Ballad is for the bold, the passionate, and the ones who don’t hesitate to wear their hearts on their walls. This bright, vibrant hue makes a statement in any room—especially in spaces where energy and excitement are key, like an entryway, an art studio, or even a playful kitchen. 


      Romantic Ballad 1183


       A Lot of Love 1114 – Because More is More

      1114 A Lot Of Love

      Love isn't just a feeling—it's a full-on experience! A Lot of Love brings warmth and joy into any space with its rosy, heartwarming hue. This colour is ideal for bedrooms, nooks, or even a dining area where every meal feels like a romantic dinner. Add gold accents for a touch of luxury or keep it casual with natural woods and soft textures.


      1114 A Lot Of Love


      Be Mine 0078: The Colour of First Crushes and Forever Love

      0078 Be Mine

      Remember the rush of a first crush? That giddy excitement, the butterflies fluttering in your stomach? Be Mine captures that feeling in a lively and playful pink. Perfect for an accent wall, a charming powder room, or a creative workspace, this shade is a bold declaration of love—both for yourself and for your home.


      0078 Be Mine IMG


      True Romance 1250: A Love Story in Every Brushstroke 

      1250 True Romance

      For those who believe in grand gestures and sweeping love stories, True Romance is your go-to shade. A deep, enchanting colour, it’s perfect for creating a moody, intimate setting. Use it in a bedroom for a luxurious and cozy vibe, or let it bring sophistication to a dining space where unforgettable conversations (and maybe a glass of wine or two) unfold. 


      True Romance 1250


      Impatient Heart (0063): Love at First Sight

      0063 Impatient Heart

      Soft and dreamy, Impatient Heart is the whisper of a love letter on antique parchment. This sweet shade is perfect for a cozy reading nook where you can curl up with your favourite novel (or your journal full of swoon-worthy poetry). Pair it with textural accents, brocade curtains, antiques and flickering candlelight to create an effortlessly charming space. 


      Impatient Heart 0063


      Lover’s Kiss (0067): Sealed with a Splash of Colour

      0067 Lovers Kiss

      No love story is complete without a kiss, and Lover’s Kiss delivers just that—a perfect balance between sweet and seductive. This colour is striking and full of charm, making it a great choice for accent pieces like painted furniture, doorways, or even a statement corner of your living room. Pair it with cool neutrals to let it shine, or mix it with deep, dramatic tones for a passionate, cinematic feel.


      Lovers Kiss 0067


      Love Where You Live

      Whether you're painting a full room or just adding a few romantic accents, these colours bring a little love into every corner of your home. So go ahead—paint with passion, embrace the romance, and create a space that truly speaks to your heart.


      Would you use this love-inspired palette in your home? Let us know which shade stole your heart!

    • A Fresh Take on Mexican Warmth - 7 Vibrant Colours to Brighten Up Grey Days

      by Jerwin Bautista | Feb 06, 2025

      As the weather stays chilly and the skies still grey, it’s the perfect time to add some warmth and light to your home. Drawing inspiration from the art, culture and ambiance of Mexico, you can bring that bold, lively spirit into your space with the right mix of colours, textures and design elements. Whether you’re going for an entire room makeover or simply adding small accents, here are a few ways to infuse your space with sun-soaked beauty. 


      Bold Textiles for Added Texture

      Mexican design is known for its use of handwoven textiles – incorporating bold, colourful fabrics can breathe new life into any room. Think patterned blankets, vibrant throw pillows or a statement rug. A mix of textures makes any room feel cozy and adds visual interest. Try something like Otomi fabrics, with their vibrant hand-embroidered animal and nature motif, and pair them with the bold, colourful horizontal stripes of traditional Mexican serape blankets. When bringing your ideas to life, support Mexican artisans by purchasing directly from them or through reputable companies with established fair-trade partnerships, ensuring ethical sourcing and respect for craftsmanship.


      Try Terracotta

      Think sun-baked roof tiles, earthy clay pots, bright pottery with rust-orange bases – nothing captures the essence of Mexican warmth quite like terracotta. Whether it’s a terracotta-coloured accent wall or simply adding some terracotta pots to your décor, this rich tone instantly adds depth and character to your space. Use terracotta to add life to a neutral room, offering just the right amount of warmth to balance out cool tones. Try Cloverdale Paint’s Terracotta (CA224), Sunset (EX175), or Casa de Oro (1026) and pair them with brightly coloured throw pillows, rugs and baskets.  Don’t forget plenty of plants!


      CA224 TerracottaEX175 Sunset1026 Casa de Oro


      Vivid Colours and Tiles

      Embrace the vibrant spirit of Mexican streets in your home by weaving in lively, bold colours. Mexican cities are known for their striking palettes—think deep cobalt blues, fiery reds, sunny yellows, and lush greens. Whether it's a feature wall that captures the energy of a bustling Mercado or an intricate Talavera tile backsplash reminiscent of traditional craftsmanship, these colours can truly transform a space.


      Feeling a little nervous about so much bold colour?

      Achieving the vibrant spirit of Mexican interior design in your own home can be beautifully balanced by toning down bold colours while embracing the iconic shapes and elements of Mexican style. Arched doorways, rounded niches, and curved alcoves add architectural interest, bringing a sense of softness and warmth to a room without overwhelming it with bright colours. Muted terracotta shades, for instance, can be used on feature walls or as accents, delivering the warmth of Mexican earth tones but in a softer, more subtle way.    


      CA223 SunstoneEX258 Red DeerCA061 Hazelnut


      In the kitchen, subdued cobalt blue cabinetry adds depth and richness, echoing traditional Mexican hues but in a way that feels calm and modern. Combined with natural textures like wood and stone, this approach captures the charm and beauty of Mexican design in a refined, understated manner, bringing a touch of that spirited style into a more relaxed, harmonious space.


      EX040 Estate


      Showcase art that tells a story and adds a vibrant dimension to your space.

      Frida Kahlo, the renowned Mexican artist, is celebrated for her bold use of colour, emotional depth, and vivid portrayal of Mexican culture. Her art embodies resilience, self-expression, and a fearless embrace of both beauty and pain. Adding Kahlo-inspired pieces or prints to your home brings a touch of this iconic vibrancy, transforming any space with her unmistakable palette of rich reds, deep greens, and electric blues. Whether it’s a striking self-portrait or a floral still life, her works create a focal point filled with energy and emotion, adding a layer of cultural richness and artistic intensity that breathes life into any room. 


      Ready to add some radiance and energy to your home? To achieve these Mexican-inspired looks, try Cloverdale Paint’s Renaissance® Interior/Exterior Waterborne Alkyd Enamel for high-traffic areas and standout elements like doors, shutters or cabinets. Renaissance’s advanced hybrid formulation provides the durability and smooth finish of an alkyd enamel with the easy clean-up and low odour of waterborne paint. It's versatile enough to be used on a variety of surfaces – from wood and metal to fibreglass and laminates – ensuring you achieve a professional-grade finish every time. 


    • 5 Organic Gemstone Colours We Love

      by Jesse Dang | Jan 20, 2025

      Organic gemstones are unique in that they are not minerals but are instead derived from living organisms or biological processes. These gemstones have been cherished for centuries, often prized for their beauty, rarity, and cultural significance.  Let’s dive deeper into their colours and how we can embrace them in our homes in the form of wall paint colour.

      Keep organic gemstones in their natural habitat but capture their beauty in your home today!


      1) Pearl

      Pearls, like whispers of the sea, shimmer with a delicate, enchanting glow that seems to come from within. Their lustrous surfaces reflect light in a way that feels almost magical, casting an ethereal, soft radiance. Each pearl is a treasure of nature, unique in shape and size, yet it’s their colours that stir the soul. From the purity of white to the warmth of ivory, the blush of rose, the cool mystery of silver, and the allure of black—every shade tells a story of timeless elegance and love, embodying nature's most poetic beauty.  Bonus:  Order your paint with our “Gloss Level 3- Pearl” to capture the true essence of this gemstone.

      White Pearl

      The most traditional and iconic type of pearl, with a pure, soft white hue and a reflective surface that gives off subtle, cool undertones. 


      0021 Barely White

      white bedroom


      Ivory pearl

      Ivory pearls have a warm, ivory tone, often with hints of pale yellow or gold. 

      0271 Clover Honey

      0271-clover-honeyIvory colour


      Rose Pearl

      Rose pearls have a delicate pinkish hue, often associated with romance and subtle femininity. 


      0126 Sauterne

      0126 Sauterne

      rose pearl colour


      Silver or grey pearl

      Silver pearls have a cool, metallic sheen, often appearing in shades of grey with a hint of blue or lavender. 


      CA199 Lavender

      CA199 Lavender

      Soft pale grey with a hint of lavender paint colour in a bedroom


      Black Pearl

      Black pearls are rare and striking, often displaying a range of hues like dark green, blue, or purple within their dark surface. 


      0494 Dark River

      0494 Dark River

      black pear colours


      2) Amber

      Amber, a timeless treasure born from ancient forests, holds the golden glow of the sun within its warm embrace. Its hues, from honeyed yellows to deep, fiery oranges, seem to capture the essence of eternal sunsets. Within its heart, fragments of long-lost worlds—tiny leaves, delicate insects—are preserved forever. Amber whispers of protection and healing, grounding the soul in an embrace as ancient as time itself. A gem of nature’s memory, it carries with it the magic of distant eras, symbolizing a love that transcends time and endures, glowing softly through the ages. 


      0913 Angel Food Cake

      0913 Angel Food Cake

      amber colour living room


      3) Coral

      Coral is a beautiful creation of the ocean, crafted by delicate marine organisms called coral polyps in the sunlit embrace of tropical waters. Over centuries, these tiny architects have built ethereal underwater gardens, layer by layer, with their intricate calcium carbonate skeletons. With hues ranging from passionate reds and blush pinks to serene whites and sunlit oranges, coral possesses a natural allure. Coral has long been celebrated as a talisman of life’s vibrancy and the heart’s deepest passions. It is said to weave a protective aura around us, shielding us from darkness and drawing in positive energies.


      1074 It's My Party

      1074 Its My Party

      coral colour inspired room


      4) Jet


      Jet is born from ancient forests, where trees, once towering and vibrant, were laid to rest beneath the earth, their secrets hidden for millions of years. Under immense pressure, these noble woods transformed into a deep, mysterious gemstone, a dark beauty that bridges the worlds of past and present. Cloaked in velvety shades of black and deep, chocolate brown, jet possesses an alluring smoothness and a feather-light touch. It has long been prized for its elegance and is lovingly crafted into intricate carvings and delicate beads. Jet is a gemstone of memory and melancholy, a favourite for mourning jewellery during the Victorian era. It is believed to envelop its wearer in a protective embrace, absorbing sorrows and shielding them from negative energies, like a silent guardian of the heart.


      CA211 Storm

      CA211 Storm

      jet gemstone colour inspiration living room


      5) Shell

      Shell gemstones are gifts from the ocean, born from the secretive embrace of mollusks. Mother of Pearl, with its ethereal shimmer, forms the luminous inner layer of certain shells, while abalone, a unique sea dweller, is celebrated for its mesmerizing, kaleidoscopic interior. Mother of Pearl glows with gentle, pearlescent radiance, typically in soft whites and delicate pastels, like the first light of dawn. Abalone, on the other hand, is a symphony of colours, its iridescent surface dancing between vivid blues, greens, and purples, reminiscent of sunlit waves upon a vibrant reef. These enchanting materials are imbued with the essence of serenity and intuition. They are believed to offer a calming presence and protective energy, making them beloved choices for bohemian and coastal-inspired jewellery, each piece a whisper of the sea’s timeless magic.  Bonus: consider using a higher gloss paint finish to capture the reflective qualities!


      Abalone  

      0690 Blue Period

      Blue Period 0690

      abalone gemstone colour inspiration bathroom


      Mother of Pearl

      EX285 Lace

      Lace EX285modern bathroom with a mix of shiny white painted walls and large-format glossy white tiles


      Colours will look different from digital screens. Please visit your nearest Cloverdale Paint store today and pick up a sample colour card to test based on ideal lighting conditions.


    • Bringing Nature Indoors: How These 12 Natural Colours Create Inviting Spaces

      by Jerwin Bautista | Jan 07, 2025

      Embracing Nature-Inspired Colours in Home Design

      In a world where modern life often limits time spent outdoors, people increasingly seek ways to reconnect with nature within their own spaces. Incorporating nature-inspired colours into home design does more than add aesthetic appeal—it creates an environment that nurtures the mind, body, and soul. These tones bring in a calming influence, providing an emotional anchor that’s both familiar and comforting. When we align our surroundings with natural hues, we make a conscious choice towards mindfulness, well-being, and simplicity.

      The Emotional Connection to Nature-Inspired Colours

      Natural tones foster a sense of connection to the outdoors, making interiors feel personalized and reflective of a lifestyle that values balance and restoration. A palette that includes shades reminiscent of natural landscapes—like forest greens, sky blues, soft sands, and earthy browns—can turn any room into a sanctuary that rejuvenates and grounds.

      Timeless Appeal and Adaptability

      Nature-inspired colours offer an elegant, timeless look that withstands changing trends. Unlike bolder shades that may quickly feel dated, earthy tones provide long-lasting appeal. Their versatility allows them to complement various design styles, whether rustic, modern, or minimalist, making them a trusted choice for homeowners and designers alike.

      Symbolizing Simplicity and Sustainable Living

      Natural hues symbolize more than just beauty; they represent a shift towards sustainability. By choosing colours inspired by the environment, we foster a connection to sustainable living and environmental stewardship. This mindful approach to colour selection speaks to a deeper value of preserving and respecting the world we inhabit.


      Deeply Rooted

      Reflecting the enduring relationship between plants and soil, this combination feels balanced and organic, offering both freshness and warmth—green for growth and vitality, and golden browns for stability and anchoring. Green is calming yet lively, reminiscent of sunlit foliage and shade-dappled leaves, evoking feelings of tranquillity and well-being. Leaf green is a versatile tone that adapts to various natural settings, from dense woodland to open prairies, making it a grounding yet energizing colour. 


      0266 October Harvest0249 Butterscotch MousseEX279 Volley


      Well-being and Tranquility

      Colours play a vital role in shaping our mood and emotional state. Certain shades have the ability to reduce stress, encourage relaxation, and even enhance focus. Natural colours, especially those drawn from the gentler side of the spectrum, are particularly effective at creating a calming environment. Pale blue-green, with its gentle blend of cool blue and refreshing green, evokes the tranquillity of nature, reminding us of the sky, the ocean, and lush landscapes. By incorporating this hue into your home, you can cultivate a peaceful atmosphere that nurtures both body and mind.    


      CA123 Alabaster0475 Foggy Mist0497 Restful Retreat

      Deep Comfort

      Picture a hue reminiscent of the vivid reds of autumn leaves or the striking foliage of a Japanese maple. With walls adorned in this warm, enveloping shade, the space exudes a deep comfort, drawn from nature’s calming elements, transforming it into a welcoming retreat as temperatures dip in northern regions. This rich burgundy finds harmony in the room’s textures, with a plush velvet sofa in deep wine, accents of rich gold, and decor pieces in warm amber and golden tones.

      Expansive windows frame the outdoor scene, where autumn’s ochre, fiery orange, and crimson leaves become a natural extension of the room’s palette. Sunlight filters through, and as it touches the burgundy walls, the rich warmth and earthy beauty of the autumn landscape intermingle, creating a seamless, grounded blend of indoor and outdoor that nurtures a profound sense of comfort and connection.    


      0116 Cordova Burgundy1061 April Love0252 October Bounty


      Stay Grounded

      Soft tans and warm browns mimic the earthy tones of sand and iron-rich soil, offering warmth and comfort. Bone white adds a clean, airy ceiling that reflects natural light, much like a bright sky or smooth stone. Rich darker leafy green walls introduce a fresh organic feel and evoke the lushness of forest foliage, adding depth and a sense of life to the space. Together, these colours form a harmonious palette that mirrors nature’s balance, creating a tranquil and inviting atmosphere.

      Layer plants with soft warm taupe walls. Create an inviting atmosphere providing a neutral, grounding backdrop, allowing the vibrant greens of the plants to pop while maintaining a soft, organic atmosphere.    


      EX175 SunsetEX010 Rodeo0746 Mother Nature


      Incorporating nature-inspired hues into home design is a powerful way to create spaces that resonate with our intrinsic need for calm, connection, and well-being. Colours drawn from natural landscapes—whether the deep reds of autumn, the tranquil blue-greens of serene waters, or the earthy warmth of taupe and forest green—imbue rooms with a timeless comfort and grounded elegance. They bridge the indoors with the natural world outside, transforming our living spaces into sanctuaries that nurture both body and mind. By choosing these calming, organic shades, you’re crafting more than just a visually appealing home—you’re building a haven that aligns with nature’s restorative power, supporting a lifestyle rooted in mindfulness and simplicity.